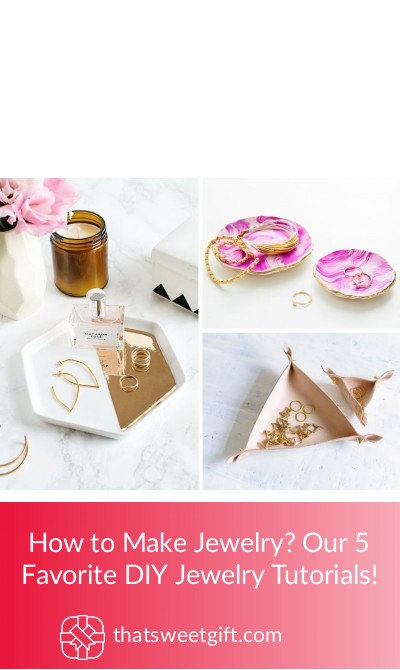
How to Make Jewelry? Our 5 Favorite DIY Jewelry Tutorials!

Buying jewelry can be a fun and exciting experience, especially when you find the perfect piece to add to your collection. But, what if you had the ability to create your own custom pieces?
Learning how to make jewelry is easy, especially when you have step-by-step tutorials at your disposal. Below are our five favorite jewelry making tutorials that you can use to create unique necklaces and bracelets.
1. Geode Slice Necklace

Perfect for women who are looking for a piece of natural elegance, this geode slice necklace tutorial creates a stunning piece of jewelry with ease. You’ll need a few different tools that you can easily find either online or from your local crafts store.
What You’ll Need
- 1 top-drilled geode slice
- 10x round crystal beads
- 12x flat rondelle beads
- 22x eye pins
- 5cm 18 gauge beading wire
- 2mm chain
- 10mm jump ring
- 4mm jump ring
- Lobster claw clasp
- Jewelry pliers
Directions
✓ Take your top-drilled geode slice and thread the beading wire through the hole. Pull both ends of the wire so that one end is shorter than the other, approximately 3mm above the top of the geode. You can then bend the longer end of the wire until it reaches a 90-degree angle close to where the end of the shorter side of the wire finishes.
✓ Using the longer end, create a loop and then wrap the excess wire around both itself and the shorter end. Make sure that all edges of the wire are covered and cut off any excess.
✓ Put one of the rondelle beads on an eye pin and then cut off the excess pin. Create a string of beads by alternating the round and rondelle beads until you have a string of approximately 11. You can then repeat this process using the remainder of your round and rondelle beads.
✓ Attach the stringed beads to the loop that you created at the top of the geode slice. This is when you’re going to want to measure the length of the necklace to find the perfect length. Once you’ve found the ideal length, cut the chains and attach one to the other.
✓ Using the 10mm jump ring, attach it to one end of the chain length and use the lobster clasp on the other end with the 4mm jump ring.
Source tutorial: Twocheekymonkeysdesigns
2. Contemporary Stacking Necklace
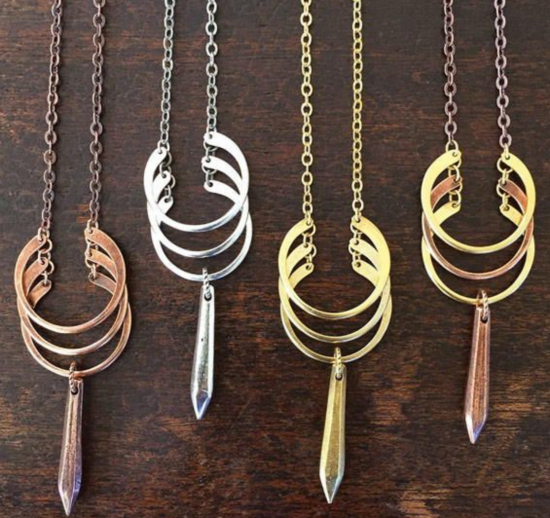
If you’re looking for a jewelry tutorial that will create a modern and unique piece, this is the one for you.
What You’ll Need
- 3x wire open circle pendants
- 1x metal elongated drop pendant
- 2x 9mm jump ring
- 1x 10mm jump ring
- 1x lobster clasp
- 10x 4mm jump rings
- 16” chain
- Needle nose pliers
Directions
✓ Using your needle nose pliers, attach the 4mm jump rings to each end of the wire open circle pendants.
✓ Before closing all of the jump rings, attach your chosen chain to the rings on one of the pendants to both sides.
✓ Once all of the jump rings have been closed and the chain is attached, connect two of the circle pendants together using another 4mm jump ring. Make sure that you connect the pendants on both sides.
✓ Taking the third open circle pendant, follow the same process, though you’ll be attaching it to the bottom pendant.
✓ Measure the necklace around your neck and cut your chain as necessary to achieve the perfect length. You can then affix the lobster clasp to one end of the chain with the 9mm jump ring. Using your needle nose pliers, attach the 10mm jump ring to the other end of the necklace.
✓ Taking a second 9mm jump ring, thread it through your drop pendant and hook the pendant onto the very bottom open circle pendant, closing the jump ring.
Source tutorial: Favecrafts
3. Midnight Mandala Chokers
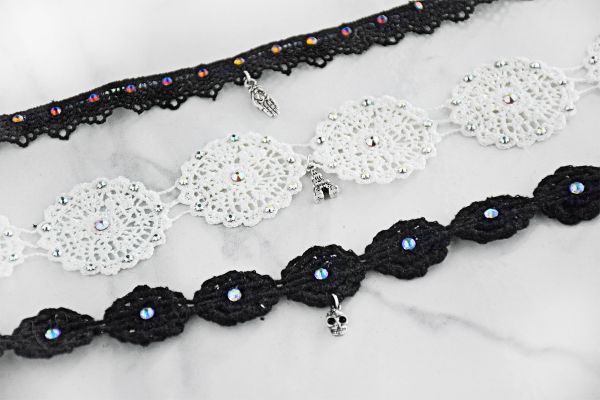
For a more youthful option for a necklace, this vintage and timeless choker can be paired with a wide variety of outfits. It’s also one of the easiest tutorials on this list.
What You’ll Need
- Swarovski crystal flatbacks
- Mixed silver charms
- Lace trim
- 1x 4mm jump rings
- 4x 6mm jump rings
- 2x silver lobster clasps
- Ribbon ends
- Gem-Tac
- Flatnose Pliers
- Scissors
Directions
✓ Cut a piece of lace that will comfortably fit your neck just like a choker would. Using the ribbon ends, add them to each end of the lace strip.
✓ Taking four 6mm jump rings, attach two to each side. You can then attach two lobster clasps to one side of the lace trim.
✓ Using your 4mm jump ring, attach your chosen charm or pendant to the center of the lace. At this point, you can also use the Gem-Tac to dab a small dot of glue onto the lace wherever you’d like to place your flatback crystals.
✓ Allow the necklace to dry for several hours before wearing.
Source tutorial: Quietlioncreations
4. Wire Wrapped Rings
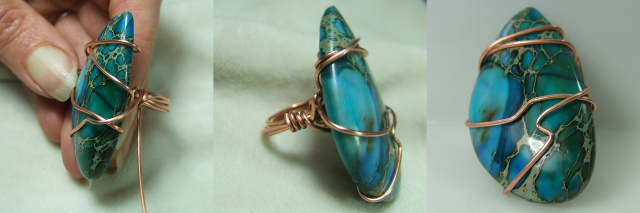
Wire wrapped rings have become quite popular over the years as they have a stunning boho-inspired appeal.
What You’ll Need
- 5 feet of 18-gauge wire
- Elongated stone (without hole)
- Ring mandrel
- Chain nose pliers
- Flush cutters
- Small hammer
Directions
✓ Flush cut approximately 2.5 feet of your 18-gauge wire.
✓ Using your mandrel, place the middle of the wire at the top and then wrap each end of the wire around the mandrel from back to front until the wire ends are at the front.
✓ Cross the wires together at the center of your wrap and then continue to wrap them together until you have a small flat circle.
✓ Using your small hammer, gently hammer the circle down until it’s as flat as possible and you can then remove your ring from the mandrel.
✓ Take one end of the wire and wrap it around the ring band until there is just enough length remaining to wrap around your stone. Use your chain nose pliers to press down the newly wrapped section.
✓ Place your stone on the center of the circle on the front of the ring. Using one end of the wire, wrap it around the stone from the bottom to the top. Follow this process with the other end, starting from the top and working to the bottom.
✓ Flush cut the remaining wire and press the ring band down once again using the chain nose pliers.
Source tutorial: Magpiegemstones
5. Sliding Knot Bracelets
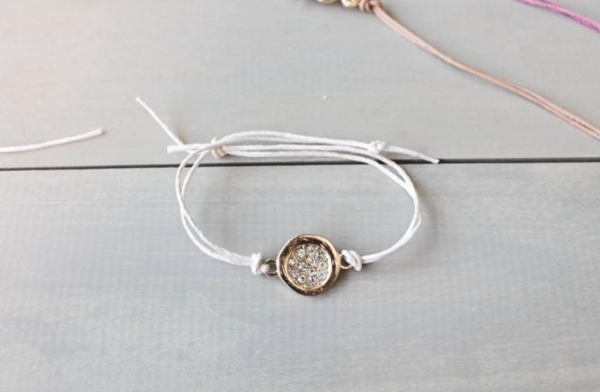
Sliding knot bracelets are a perfect gift for yourself but can also be the ideal best friend present. They look great and are simple to make with a couple of basic materials and tools.
What You’ll Need
- Leather cord
- Pave connectors
- Circle connectors
- Charm links
- Scissors
Directions
✓ Cut two pieces of your leather cord that are approximately 13 inches long, depending on the width of your wrist.
✓ Slide the charm to the middle of the cord and create a knot on both sides of the cord. You can then add to final knots to either end of the leather cord.
✓ Cut the third piece of cord that is about seven inches long and make a loop using about three inches of the cord.
✓ Line up the ends of the bracelets and create a loop, holding it on top of the bracelet. Taking the long end of the loop, wrap it around the bracelet four to five times. You can then pull the long tail through the loop, make sure that you pull it tight.
✓ Knot each end of the cord and trim off any excess.
Source tutorial: Consumercrafts
Pin for later