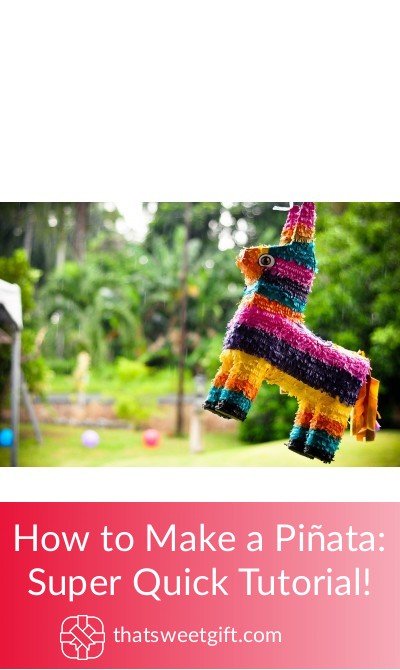
How to Make a Piñata: Super Quick Tutorial!

One of the quintessential things to have at a party is a piñata, however, stores can easily sell them for way more than they’re worth, especially as there are plenty of ways to make your own at home. No matter if you’re planning an upcoming birthday party or if you want a fun and exciting activity that’s reminiscent of your childhood, there are plenty of unique and creative ways to craft your own piñata at home. Below is our favorite method, including links to all of the items you’ll need for the job.
Step 1: Gathering Your Supplies
The very first thing you’re going to need to do is to get everything that you need for your own DIY piñata. In this guide, we’re going to discuss the paper mache method as this makes the most traditional-looking piñata possible, making it the perfect partner for an upcoming event. You’ll need several items, including:
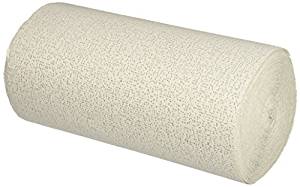
Plaster cloth: This 5-pound roll of ACTIVA Rigid Wrap Plaster Cloth is our favorite because it’s much easier to work with than newspaper and it helps to form a more rigid shape than thinner materials, such as paper.
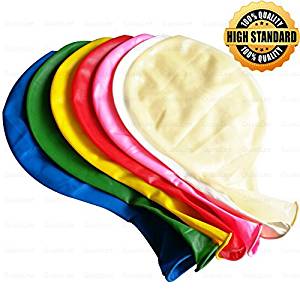
Large round balloon: When choosing balloons, you’ll want to make sure that you have a large enough size to fit all of the treats that you could dream of. We recommend 36” as it’s three times as big as traditional balloons and still easy to work with. These GuassLee balloons are made out of natural latex and are incredibly thick and strong for handling the plaster cloth.
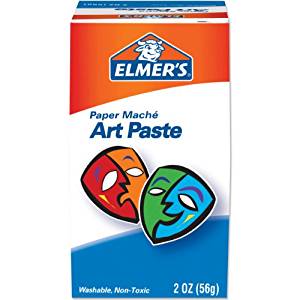
Paper mache paste: There are plenty of DIY recipes for paper mache paste, however, there’s no need to buy extra ingredients when you can get the right formula right out of the box. This Elmer’s Paper Mache Art Paste comes ready-made and is non-toxic and colorless. Also, you can store it after you’re done so that it can be reused in the future.
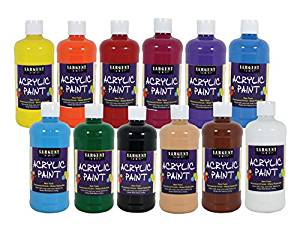
Paint (colors of your choosing): Depending on the aesthetic of your event, you’re going to want to choose paints that fit your needs. We love the Sargent Art Acrylic Paint Set because it comes in 12 different colors that you can either use alone or mix together, based on your preferences.
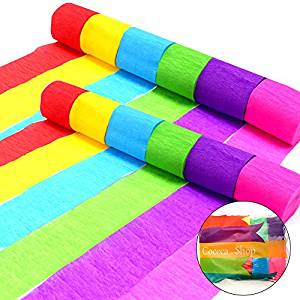
Crepe paper: Your piñata should be all about vibrancy and stunning colors that will capture the eyes of your guests, and with the help of crepe paper you can enhance the paint colors on the plaster cloth. With the Coceca Crepe Paper, you get 36 rolls of 6 different colors, giving you more than enough options for decorating.
Yarn: Yarn isn’t the most important part of your project and as such, you won’t need to spend a lot of money on a roll. We recommend the Lion Brand Yarn because it’s inexpensive, easy to use, and made out of 100% real cotton.

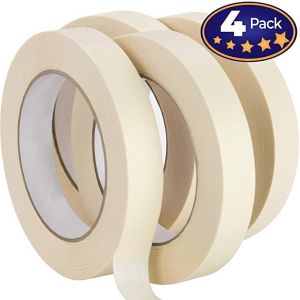
Masking tape: Similar to the yarn, as you won’t see the masking tape once the piñata is painted and decorated, any type will do. We like the Nova Supply 4-Pack because it comes with 4 individual rolls of strong and sticky masking tape.
Step 2: Preparing the Materials
Once you have everything that you need, it’s time to start the grunt work before the creative part of the project. You’re going to want to blow your balloon up to the perfect size and then find a bowl that your balloon can fit on top of, then put plastic wrap on the surface of the bowl and place the balloon down.
Next, it’s time to prepare the plaster cloth by simply cutting strips and remember, you’re going to need a lot. Ideally, you’re going to want to make 1-inch wide by 8-inch long strips, depending on the size of your balloon.
The last preparatory step is to get your paper mache paste ready by following the directions on the box. It should be much simpler than making your own, especially as it already comes pre-made.
Step 3: It’s Time to Paper Mache!
Dip each of the strips of plaster cloth inside of the paper mache paste and get rid of any excess glue with your fingers. You can then spread the strips across the surface of the balloon, making sure that each strip lies in a different direction than the next until it’s covered completely. It’s important that you leave a small hole at the bottom of the balloon (where it’s tied) so that you can remove it after the paper mache dries and you can fill it with candy.
Once you have your first layer completed, allow it to dry fully and then proceed with a second and third layer, making sure that each layer is dried. Once all of the layers are thick and solid, pop the balloon and remove it from the hole at the bottom.
Step 4: Decorating Your Piñata
Now that you have the base of your piñata made, it’s time to decorate it with designs of your choosing. There are plenty of ways for you to do it, however, we recommend painting it first and then laying any crepe paper on top for an added effect. Remember, the brighter it is, the more likely people will be to participate in the activity and so you’re not going to want to go for subtle decorations.
Step 5: Hanging the Piñata
As soon as your decorations have fully dried, it’s time to hang the piñata with the help of your yarn and masking tape. You’re first going to want to make four small holes around the larger hole at the bottom of the piñata and then thread your yarn through each of the holes, tying them together at the top.
Grab your masking tape and cover the smaller holes, adding a little bit of extra security to the yarn so that it doesn’t immediately tear as soon as the piñata is hit once. At this point, you should fill the piñata with as many sweet and salty snacks as you can think of and then use a longer piece of yarn, tying it to the four other strings, and you should be ready to hang it up and play!
Final Thoughts
There’s nothing more fun than being able to bash your way to sweet treats, especially at a birthday party. With the help of these ready-made ingredients and easy to follow instructions, you’ll be able to create the most unique piñata for every occasion!
Pin for later