How to Gift Wrap a Circular Object

We don’t know about you, but often times the real stress of gift giving doesn’t come from finding the right gift, it comes from figuring out how to wrap it! If you have a perfect square or rectangular item you are okay, but what happens when the gift your purchased has a different shape? In particular, what about all those circular objects?
The round edges make it feel like gift wrapping would be impossible, but that is not the case! It is a bit tricky, but you can definitely get the hang of it. Better yet, there are a few different ways you can handle wrapping a circular objec t- from quick, easy ways, to more detailed ways. Depending on how crafty you want to get, you can find the perfect way!
Here are our suggestions for how to handle various circular objects when it comes to gift wrapping!
1. The outer box method

If you’ve got a circular/round/spherical item and you really don’t want to figure out how to wrap it, why not place that item inside of a box and then just wrap the box?
We love this wrapping ‘hack’ and use it all the time if we have any type of unusual shaped gift that we don’t want to worry about wrapping! You can always wrap the actual gift in something like tissue paper and then place that inside a box to really have it well wrapped.
This works perfectly, especially if you have a lot of unusual items to wrap and don’t feel like wrapping them all on their own. Just make sure you get a box that is big enough to easily hold the item!
2. The tissue paper method
If you still don’t want to deal with using wrapping paper on your gift, but you want to wrap the gift itself without placing it in a box, consider the tissue paper method!
Tissue paper is much easier to work with than wrapping paper which can easily rip. All you need to do is get your tissue paper and wrap it around the item, gathering it at the top. You can then secure the tissue paper with a ribbon or other tie to keep it in place.
For this method to work, make sure you have enough tissue paper so that the item cannot be seen through it. To add to the presentation, get several colors of tissue paper and layer them before wrapping.
Get a nice piece of ribbon to secure things, add a bow if you want, as well as any other detail elements. You can even choose to cut the top part of the tissue paper that extends past the ribbon into little strips to make it look nicer- but that is totally optional!
This is the easiest and quickest way to wrap a spherical or cylindrical item and can be completed in just a few minutes.
2. The pleat method
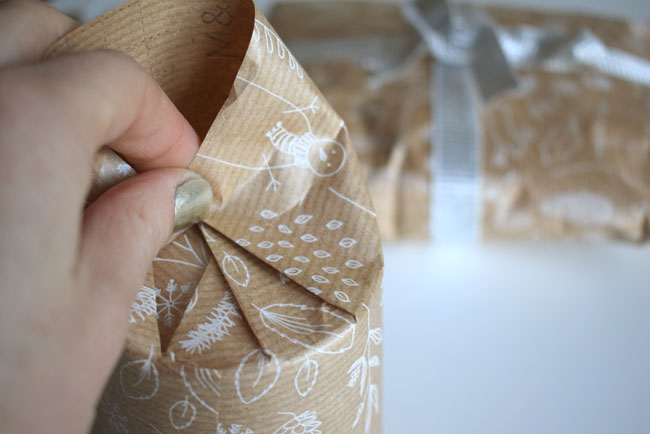
This wrapping method will work if you have a cylinder shaped item. In short, all you need to do is roll the item in wrapping paper, and then fold the edges in a pleat style to secure. If that sounds complicated, don’t worry!
There are plenty of videos out there to help. What is most important with this wrapping method is that you have the right amount of wrapping paper. You need to make sure that both ends have enough that you can pleat the paper all the way around the cylinder.
Once you’ve pleated and taped both sides, you are done! You can finish off the gift with some ribbon, a bow, or any other of your favorite gift wrap details.
Here is a great Good Housekeeping tutorial to walk you through this process.
3. The twist method
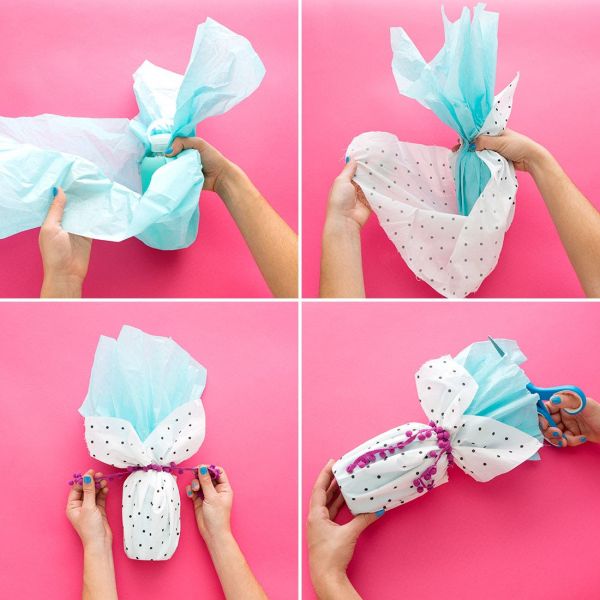
This method is a bit of a combination of the tissue paper and pleat method. While it will likely work better with tissue paper, you can use wrapping paper as well. This will also work best if you have more of a cylinder type item, but it can work with more spherical items as well! Lay out your tissue paper or wrapping paper, ensuring you have enough on either side of the item.
Roll your item in the paper and secure with tape. Now you have to deal with both sides, and instead of pleating your paper, you are just going to twist it! Twist one end at a time (similar to how a wrapped piece of candy is on either edge) and secure with string or DIY made flower ribbon. Do the same on the other side, and you’re done!
This is another relatively easy method that anyone can handle (we promise- you can do this!) Like the pleat method, it is important to have enough paper on either end so that you can grab and twist it. When in doubt, you would always rather have a little too much paper than not enough. Make sure you have equal amounts on either side.
If after your wrap and tape the item you see that you either have too much extra on one or both sides, just cut it off with some scissors! Once both sides are equal, twist, tie, and you’re done!
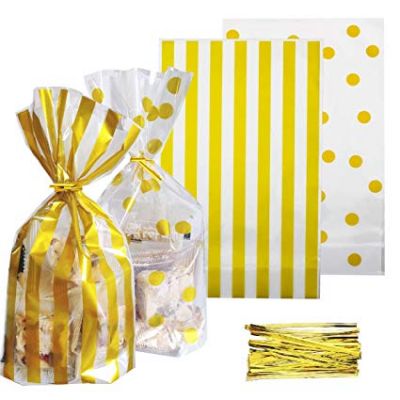
5. The gift bag method

If you are really in a hurry, don’t forget about everyone’s favorite wrapping item: The gift bag. No matter what shape of item you have, you can always throw it in a nice gift bag, add some tissue paper, and be on your way in a flash! If you forgot about wrapping your gift until the last minute, this is always an easy solution that ensures your gift will look great.
Dealing with odd shaped gifts can present a bit of a challenge when it comes to wrapping them, and circular gifts in particular are definitely tricky! However, you do have several options when it comes to gift wrapping, ranging from incredibly easy methods (like the gift bag) to more complex methods like the pleated method. No matter what you choose, you will end up with a gorgeous wrapped gift.
When it comes to the holidays, do you enjoy getting crafty and wrapping gifts, or do you always find yourself reaching for the gift bag? Let us know!
Pin for later