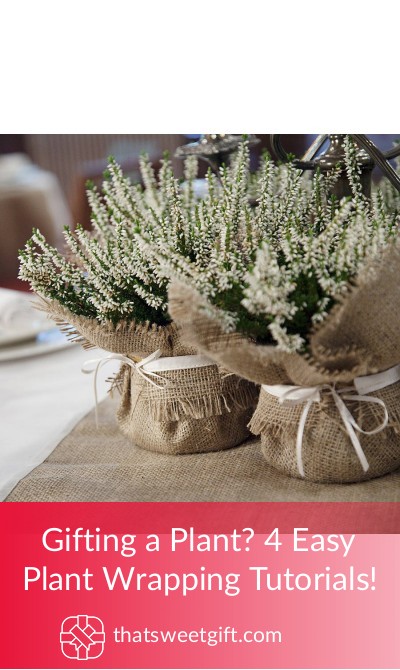
Gifting a Plant? 4 Easy Plant Wrapping Tutorials!

Wrapping presents that come in square boxes is a simple task, and in many cases, people would argue that it could be fun. When it comes to oddly shaped gifts, such as plants, wrapping becomes much more of a hassle. You’ll want to make sure you don’t damage the foliage and you’ll still want the gift to look like it was professionally handled.
Instead of waiting at the florist for them to wrap your plant gift, you can do it all on your own! With the help of these 3 easy plant wrapping tutorials, you’ll create the most beautiful present possible.
Tutorial 1: Simple and Modern Wrapping
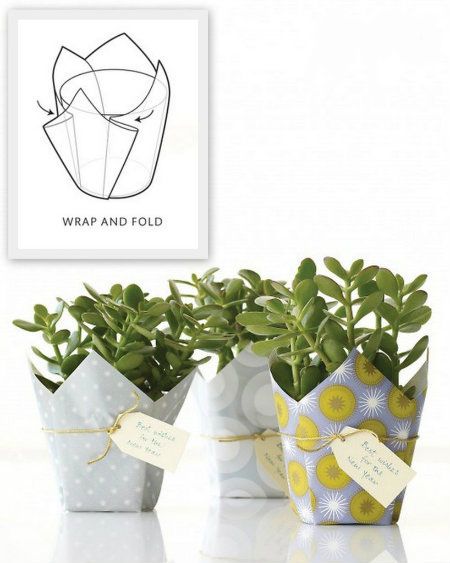
If you’re someone that isn’t interested in taking away from the spectacular display that the plant has, this is a fantastic tutorial to opt for. With this simple and modern method of wrapping plants, you can easily transform the outside of a pot. The best part is that it works for pots of all different shapes and sizes!
What You’ll Need
- Square sheets of decorative paper
- Gold cord (color of your choosing)
- Coordinating gift tag
- Double-sided tape
Directions
✓ Place the bottom of the pot on top of the decorative paper that you have chosen. Make sure that it sits in the middle.
✓ Take the opposite corners of the decorative paper and secure them to the pot using your double-sided tape.
✓ Fold up the other two flaps as well and use the double-sided tape to affix them to the pot.
✓ Add your gift tag with a personalized message and finish the entire look off by wrapping the gold cord around the pot.
Tutorial 2: Child-Friendly Plant Wrapping
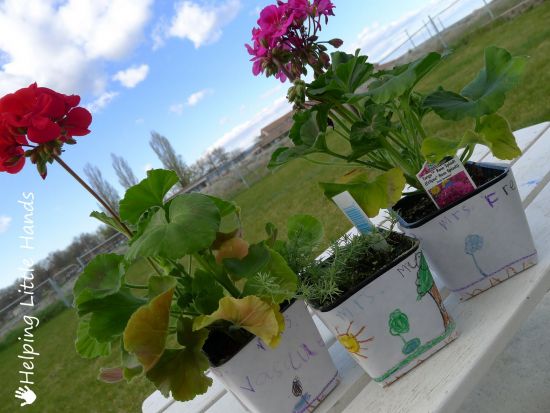
If the plant that you are giving is a gift to a friend or family member on behalf of your kids, this is a great family-friendly way to decorate. It’s the perfect option for a present for a teacher or for a Mother’s Day gift. You can guarantee that with a few simple steps, your kids will have an exciting activity that they’ll love to do.
What You’ll Need
- Freezer paper
- Crayons
- Double sided tape
- Scissors
Directions
✓ Cut a square piece of freezer paper. Make sure there’s more than enough material to cover the entirety of the pot. Even if it’s too much, you’ll be trimming off the excess later on.
✓ Fold the freezer paper in half and then instruct your children to draw on the paper to their heart’s content using their crayons. You can also use pencil crayons for this part, but we found that wax crayons work best.
✓ Once the drawing is finished, place the pot in the center of the freezer paper on the side that isn’t decorated. Fold up each of the sides, using your double-sided tape to affix the paper to the pot.
✓ Fold any extra paper around the edges and tape those down as well. At this point, you should have a clear idea of any excess paper that can be trimmed with the help of your scissors.
Tutorial 3: Leather Plant Wrapping

This is easily one of our favorite tutorials that we have come across for wrapping a plant pot. It’s the perfect combination of natural elements and the colors work perfectly together. With the use of leather, it elevates the entire appeal of the plant and helps to make it look more expensive. Out of the majority of these tutorials, this is the most stunning.
What You’ll Need
- Leather sheet
- Black twine
- Scissors
- Mini clothes pins
Directions
✓ Take the sheet of leather and cut a slit in the middle that is large enough for the pot to fit through. Once this is done, place the pot in the middle of the slit.
✓ Take opposite corners of the leather and pin it to the pot using the mini clothespins. This will help to keep the material in place until you’re ready for the finishing touches. Repeat this process for all four corners.
✓ Once everything is pinned, take your black twine and tie it twice around the entirety of the pot. We recommend finishing it off with a bow, as this adds an extra ounce of flair. Once the twine is in place, you can remove the clothespins.
Tutorial 4: Paper Bag Flower Wrapping
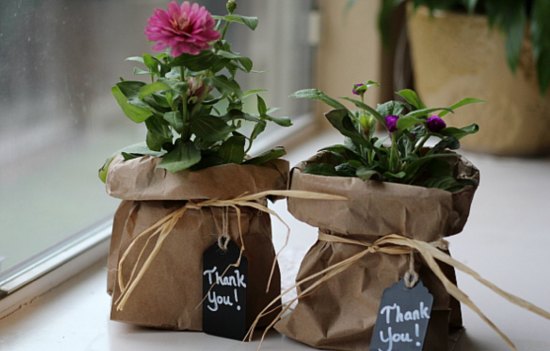
Perfect for someone who is strapped for time and is still looking for an earthy and appealing way to wrap a plant, this tutorial is for you. Even if you’re looking for an inexpensive method using items that you likely have at home, you’ll love this idea. You can even use this to wrap the flowers that you have around the house to dress up any bland pots they come in.
What You’ll Need
- 1 brown paper bag
- Jute twine
- Mini chalkboard
- Hot glue gun and glue
- Chalkboard pen
Directions
✓ Simply place the plant pot inside of the paper bag and roll the edges of the bag down so that it isn’t taller than the pot.
✓ Cut a two to a three-inch piece of twine and using the hot glue, glue each end of the twine to the back of the mini chalkboard. Allow the glue to dry fully.
✓ Once the glue is dry, thread one end of the jute twine through the hook that you have created. Wrap the remainder of the twine around the outside of the plant pot one to two times. You can tie it as tight as you desire, though the tighter the better.
✓ Using the chalkboard pen, write the recipient’s name on the board and ensure that it’s facing forward.
Final Thoughts
Wrapping plants can be a lot simpler than you originally thought. This is especially true if you have access to a few simple materials. Instead of spending hours searching for templates and professional wrapping methods, you should surely try these ideas out instead.
Not only are they simple, but they help to elevate the look of your gift, which makes it something the recipient is sure to remember for years to come.
Pin for later