How to Make Your Own Stash Box Tutorial!

Not all of us have a loose floorboard to hide things under, but most all of us have space for a book. With this smart, upcycle DIY, you can transform a hardcover book from your local thrift store into a secret storage compartment. This craft is something of a process, taking several days to complete, but it’s oh so worth it in the end!
Here’s what you’re going to need:
- A used, hardcover book (or new, if you really insist)
- Plastic wrap
- Ruler or other straightedge
- Pencil
- Newspaper
- X-acto knife or box cutter
- Sealable container
- Craft glue (think Elmer’s)
- Paint brush
Directions:
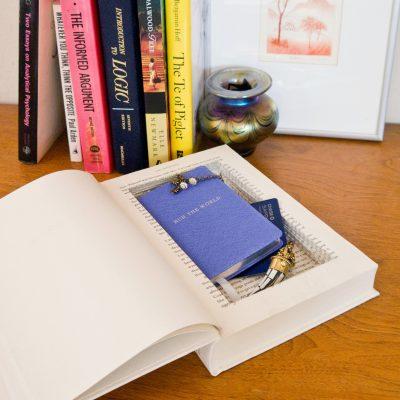
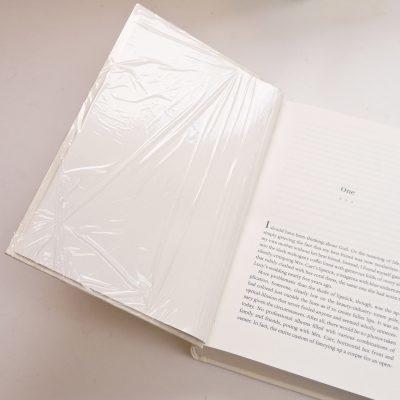
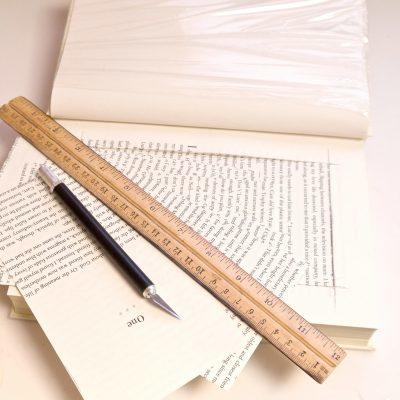
1. First up, you’ll want to pick out a book. It needs to be hardcover and thick—at least three inches, so you have space to store your hidden items. Since this is a secret storage container, you’ll want to pick a book that blends in with your collection. You don’t want people snooping, after all. Take the plastic wrap and carefully cover the cover of the book to protect it while you work.
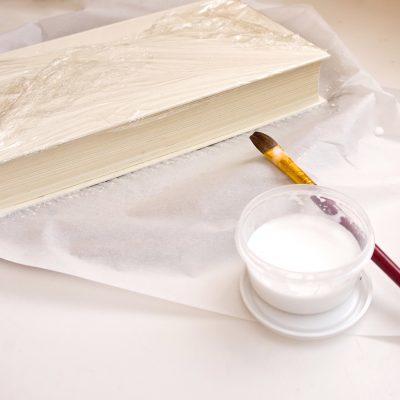
2. Lay down your newspaper to protect whatever surface you are working on, then take your sealable container and combine a tablespoon of craft glue with a tablespoon of water. Put the book on top of the newspaper and paint its sides, taking your time so that the glue mixture has a chance to soak into the pages. Clean up any drips or spills, then place something heavy on top of it and let it dry overnight. Don’t forget to seal up your container of glue and water!
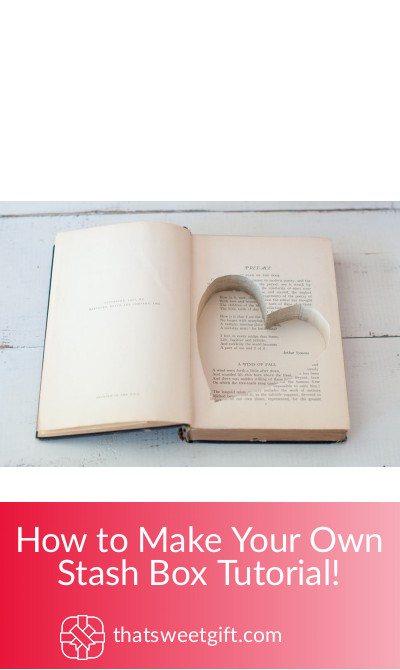
3. The next day, open the book and measure diagonally, about one inch in from each corner. Mark the end points with a pencil, then use your ruler or straightedge to draw a rectangle between these points. Take your X-acto knife or box cutter and carefully slice along the lines you just drew, being careful not to cut yourself.
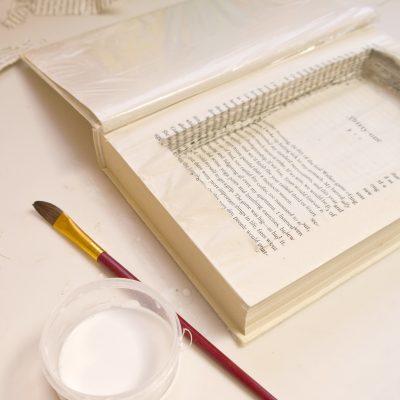
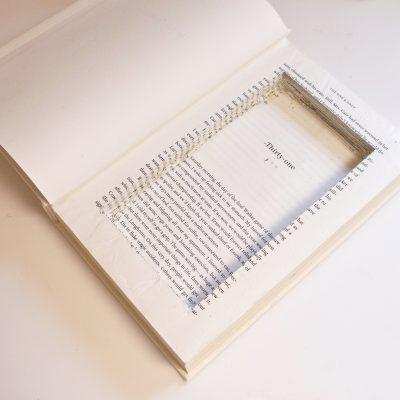
4. Keep cutting, going layer by layer until you have reached your desired depth. Take your blade and clean up your newly-formed edges. Whip out your glue and paintbrush again, coating the sides and bottom of the new rectangular cutout. If you’d like, you’re more than welcome to give the sides of the book a second coat. Close the cover and press it down, placing a heavy item on top of it once again. Let it dry overnight.
5. Your book is ready! Take off the plastic wrap, touch up your edges, and you are good to go! Fill your secret storage compartment with your most treasured items—or maybe just things that you don’t want your roommate to see.
Source: https://www.popsugar.com/
Pin for later