3 DIY Decorative Pillow Tutorials to do At Home

Decorative pillows are the perfect finishing touch to any room in your home. No matter if you’re adding an extra flair to your living room couch or your bed, they’re quite useful. Due to their popularity, some of the unique decorative pillows are also some of the most expensive.
Instead of spending hundreds of dollars on accents, why not try to make some of your own? These fantastic DIY decorative pillow tutorials are easy, fun, and are a great way to add a little personalization to your humble abode.
1. Bleach Pen Pillows
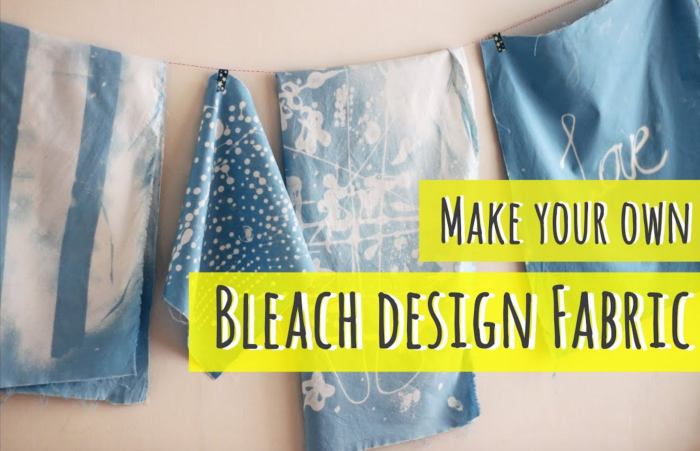
Bleach pens come into good use for a variety of reasons, though you’ve likely used them to touch up a work shirt or formal suit or dress. Little do most people know that you can also use these pens for a unique way to enhance the aesthetic of a regular throw pillow. With a bleach pen, you have full control over the designs that you can make on the pillow, far more than if you were to simply spray bleach everywhere. The best part is that for this tutorial, you likely have everything you need at home. If not, you can find bleach pens everywhere, even at the dollar store!
What You’ll Need
- An accent pillowcase (cotton works best for this tutorial)
- A bleach pen
- Cardboard
- Iron
- Scrap paper
- Ruler
- Marker (or pen)
- Tape (depending on your design)
Directions
✓ First, you’ll want to make sure that you iron the pillowcase to get rid of any creases. Wrinkles in the fabric will surely negatively affect the design you’re trying to achieve. Ideally, the pillowcase should be as flat as possible.
✓ You’ll now want to brainstorm the design that you want to do on the pillow. It’s highly recommended that you test this out on a spare piece of paper with the help of a regular pen. This will give you a good idea of the pattern you’ll want to emulate onto the pillowcase. The main thing to remember is that bleach will look slightly faded and imperfect, so don’t expect to have an exact translation of what you have drawn on the paper.
✓ If you have decided that you want to make a geometric pattern or something that requires blocking sections of the pillow with tape, it’s recommended that you do this step next. Before applying the bleach, you’ll want to make sure that you have your design fully ready.
✓ Using the bleach pen start to draw the pattern on the pillowcase. It’s important that you are careful and slow with this process, as there’s no going back once it has started. Also, ensure that you don’t rest your hand in the bleach as you are drawing. If you’re concerned about how the chemicals will take to the fabric of the pillow, test it in an inconspicuous spot before starting the main design.
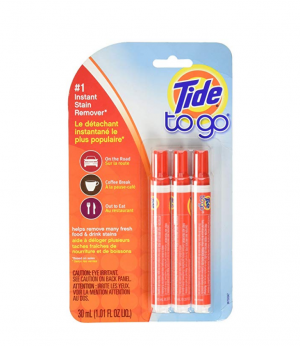
Get the Bleach Pens Here
✓ At this point, you should have finished the entire design that you wanted to achieve. Allow the bleach to dry and then repeat the bleaching process until you reach the level of bleaching you want. As soon as this process is finished, wash the pillow gently and allow it to dry fully before putting it back on the pillow.
2. Gold Foil Pillow
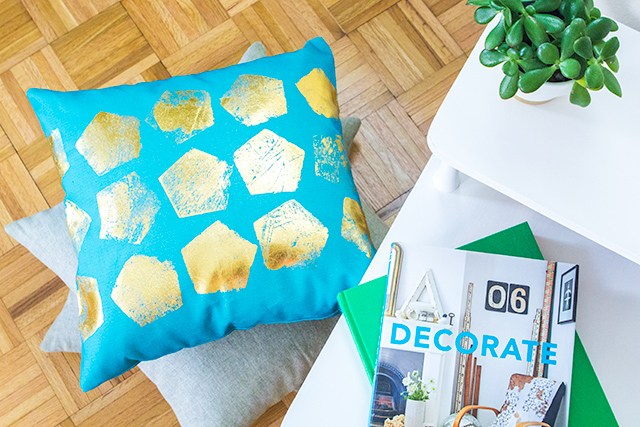
If you’re looking for a DIY that is a little more modern and chic, this is a fantastic option. Additionally, it doesn’t require the use of heavy-duty chemicals, such as bleach.
What You’ll Need
- Foil/glitter adhesive
- Gold foiling sheets
- Pillowcase
- Iron
- Chalk
- Parchment paper
Directions
✓ Similar to all other pillow DIYs, you’ll want to make sure that you iron the pillowcase to work out any creases. Once this is finished, you can proceed to the next step.
✓ Using the chalk, mark out the phrase or the image that you’ll be applying the gold foil to later on in the tutorial. This is a great idea, as you can easily rub the chalk out if you make a mistake.
✓ Using the foil/glitter adhesive, trace the phrase or design that you created with the chalk and wait until it is completely dry.
✓ Take scissors and cut the gold foil to where it will easily cover the entire design you have created. Put your parchment paper on top of the foil and iron it for approximately 30 seconds in each section.
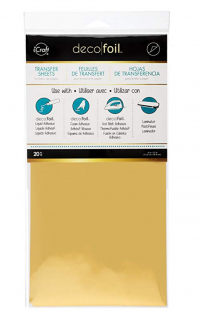
Get the Gold Foil Sheets Here
✓ Before taking the foil off, let it cool completely and then you can peel it off. Once removed, you should have a beautifully decorated pillow that you’ll love to display in your home!
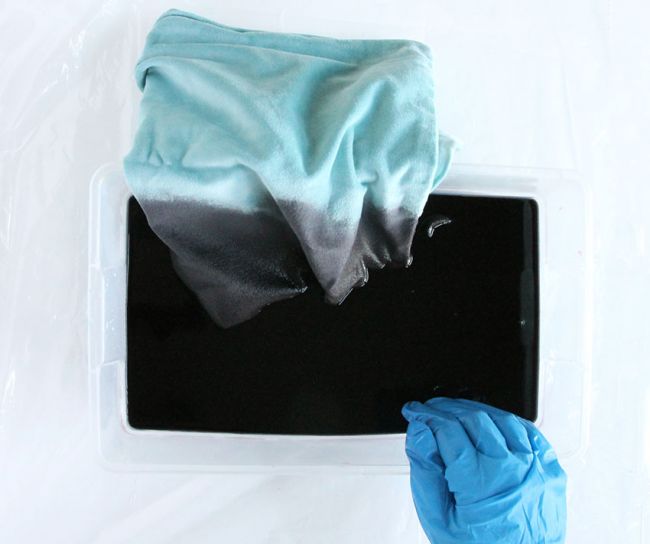
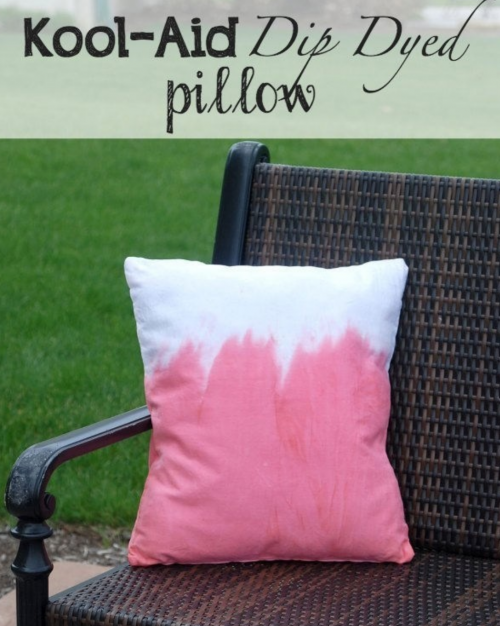
3. Dip Dyed Outdoor Pillow
Accent pillows aren’t only meant for the inside of the home, especially if you have a luxurious backyard that you frequently use for entertaining. With the help of this tutorial, you’ll be able to create spectacular pieces for your sitting area or pool chairs.
What You’ll Need
- Kool-Aid (Color of your choosing)
- Vinegar
- Water
- White twill pillowcase
- Large plastic container
- Gloves
Directions
✓ The first thing you need to do is prepare your solution. You’ll need to find Kool-Aid in a color that you’ll want your pillow to be. Once you’ve gathered all of your supplies, you can move onto the next step.
✓ Using the large plastic container, combine 4 cups of water and ½ a cup of vinegar. This is to help prepare the pillow to absorb the color. Wring the pillow entirely so that it’s damp and not filled with the solution.
✓ Empty the water and vinegar, then pour in enough of the Kool-Aid into the plastic container that will cover the majority of the pillowcase. You can also consider adding in dry Kool-Aid powder for an extra punch of color. Combine ½ a cup of vinegar to the rest of the mixture and mix all of the ingredients together to remove any clumps.
✓ You can now dunk your pillowcase into the Kool-Aid about half-way and then leave the remaining end of the pillow outside of the bucket. It’s recommended that you leave it overnight to absorb as much color as possible.
✓ Remove the pillowcase from the mixture, using gloves. Lie it out on a non-porous surface to dry. If you find you want more color, then consider dipping it and leaving it overnight again.
✓ Once finished, iron the pillowcase and put it on your pillow to display outdoors!
Final Thoughts
There are plenty of pillow DIY tutorials that you can find, no matter what your style is. All you need is a couple of ingredients and a little bit of creativity to make unique accents to pull an entire room together.
Pin for later
