Unique Homemade Thank You Cards: 6 Easy-to-Do Ideas

Being able to say thanks is likely one of the best gifts that someone can receive. If you’ve recently hosted a special event and want to show everyone how appreciative you are, they’re a cost-effective solution. This is especially true when compared to buying the cards from a store. With the help of these easy DIY projects, you can create your own customized thank you cards. Not only will the recipient appreciate the thought, but they’ll also appreciate the effort that went into the project.
1. Scrap Paper Cards
If you’re someone who is very environmentally-conscious, you’ll want to come up with a DIY project that helps you to recycle what you already have at home. When it comes to making thank you cards, it can be a great idea to reuse craft paper that you’ve bought for other projects. What we love the most about scrap paper cards is that you can create unique styles for every guest.
Using a pair of scissors, cut out shapes from your scrap paper. You can then invest in envelopes or create your own from any blank paper that you might have around the house. The main thing to consider is that you won’t want the cards to look like they are scrap, and so, ensure that you use high-quality craft paper.
2. Banner Thank You Cards
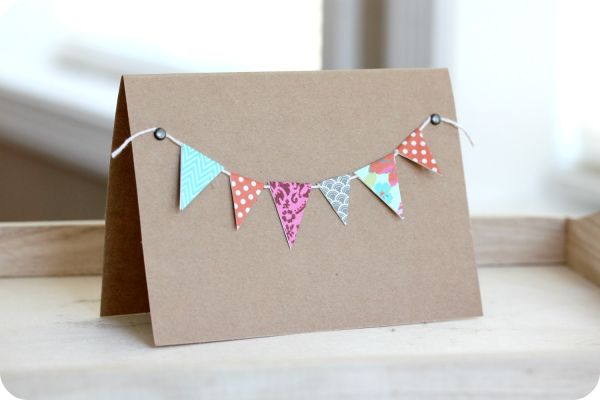
You’ve likely seen this design on cards in your local department store or gift store. In fact, it’s one of the more popular designs we’ve seen. Instead of spending a lot of money on dozens of items, you can easily emulate the design on your own. All you’ll need is basic cards, twine, brads, glue, and scrap paper.
- Cut a diamond shape out of each piece of scrap paper and then fold the diamond in half. This should give you a flag shape that you’ll be able to hang on the twine to create the flag banner.
- Take the blank thank you card and using the brads, insert one at each end. You can then cut the twine to the desired length so that it creates the string for the banner. Wrap the twine around each of the brads so that it isn’t completely taught but not too droopy.
- Take a droplet of glue and place it inside of the folded flag, then hang the flag on the string, squeezing both sides together. This will help to make sure the flags stay in position.
- Write your thank you message on the inside of the card, package it in an envelope, and then they are ready to send!
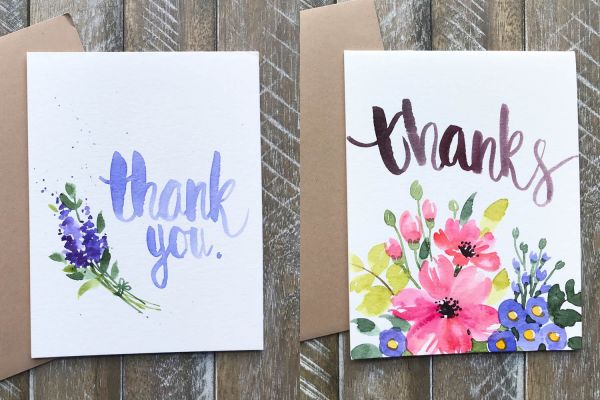
3. Hand Painted Thank You Cards

The name might sound intimidating at first, however, it’s much easier than you think. This is a fantastic idea for a kid’s birthday party or a special family event, such as Thanksgiving. The best part is that your hands won’t get dirty, but your kid’s will! With this DIY, you’ll let your kids take control and create any type of design that they want. This personal touch will be a fantastic way to show your loved ones how much you appreciate their attendance and/or gifts.
All you’ll need for this project is non-toxic paint, disposable bowls, and white paper.
- Separate the different colors of paint into the disposable bowls that you have on hand. Depending on where you’re allowing your kids to do the project, you will also want to consider preparing the area. Make sure that you protect any important pieces of furniture, as well as the floor. You may even want to purchase art smocks for them to wear or pick out some old clothing.
- Instruct your children to use their hands to create pictures on the white paper. However, make sure that they only focus on painting the bottom half of the sheet. This is because once everything is dry, you’ll be folding the paper in half.
- Once the artist has finished their work, allow the paint to dry and then you can write your message inside of the card.
4. Printable Templates
If you’re someone who isn’t too interested in delving headfirst into a hands-on activity, this is a great alternative. In fact, for those of you who are more tech-savvy, you can easily print your own thank you cards that look and feel professional. All you have to do is invest in high-quality cardstock and ink that will create spectacular images.
The first thing you’ll need to do is find thank you card templates. You might be able to find them for free on some websites, however, you’ll mostly have to pay for the original artist’s work. Once you have the right template, simply print it onto the paper. You can then cut the cards to size, write your message, and send them off.
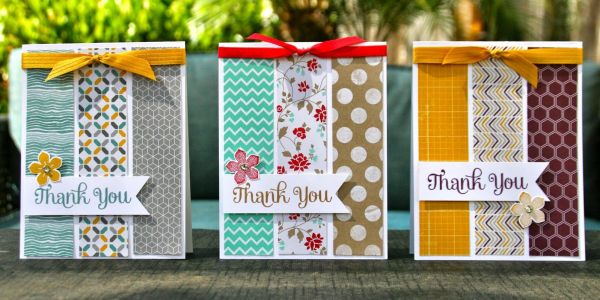
5. Paint Chip Thank You Cards
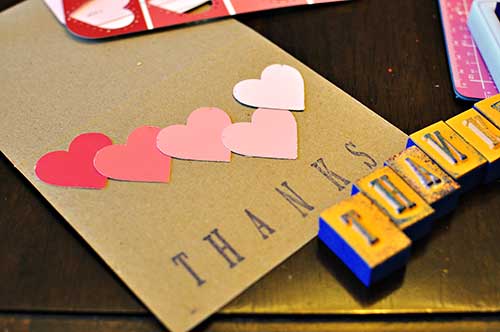
Ideal for someone who is on a budget, these spectacular cards will surely be stunning, unique, and show off your creativity. In fact, this is one of our favorite ideas for thank you cards for a housewarming party or housewarming gifts. For this DIY you’ll need an assortment of paint chip cards (without the names on the front), white thank you cards, a black permanent marker, and glue.
- Cut the paint chip cards to size so that they reach from the top to the bottom of the thank you cards you have selected.
- Using the permanent marker, write “Thanks” or “Thank You” on the lightest color chip. You can also consider using translucent stickers and printing a message so that you can simply apply the sticker.
- Take your glue and glue the paint chips to the front of the thank you card. Wait for the glue to dry and then fill out your message.
6. Repurposed Artwork Thank You Cards
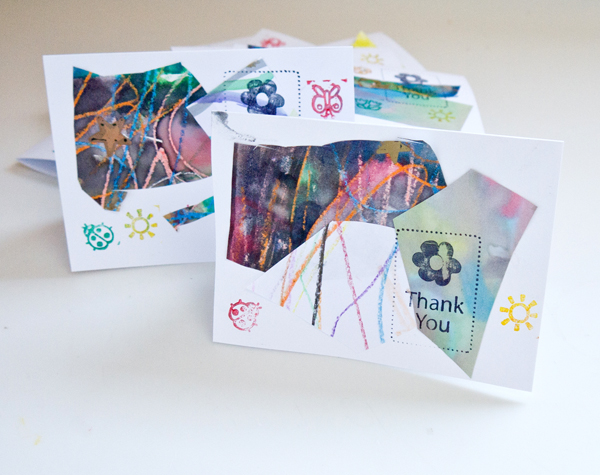
If you have kids, it’s likely their artwork is beginning to clutter the front of your refrigerator. Instead of keeping the art in a storage box or photo album, why not put it to good use and repurpose it? Even if you don’t have spare artwork lying around, you can give your kids the paint they need to create the art needed for this project.
It’s rather simple, all you need to do is cut out sections of the artwork that you think would look great as thank you cards. You can then write your warming message on the back of the artwork and package it in an envelope to be sent. The recipient will love having a piece of your family to say thank you for their gift or attendance.
Final Thoughts
With the help of these great thank-you card DIYs, you’ll be able to craft the most unique and memorable gift of all. By using a couple of items that you likely already have at home, you can save a lot of money and still create something stunning.
Pin for later