How to Make a Wine Bottle Tiki Torch Perfect for Garden Parties

If you enjoy hosting parties, you already know that it is those little details that can sometimes make the biggest difference! Whether it is a personalized place holder, centerpiece details, goodie bags to give away, or even serving a favorite recipe you are known for, it is these small details that people will remember.
For those who like hosting outdoor parties, you have so many options for creating awesome outdoor decor! Garden parties in particular are some of our favorite parties to attend.
Combining elegance with the beauty of the outdoors, it is a wonderful way to spend an afternoon or evening with family and friends.
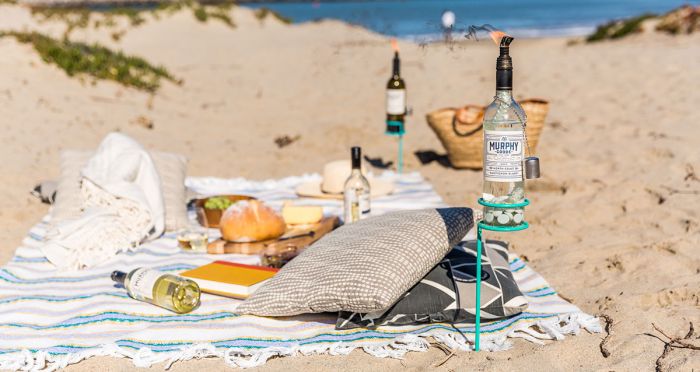
Do you enjoy hosting garden parties? Whether you’ve got a gorgeous backyard that just begs to be used for having guests over, or if there is an outdoor event space close to you that you just love setting up for special occasions, if you love hosting garden parties, you will love this idea for DIY tiki torches!
Tiki torches have long been a favorite for outdoor lighting, as well as bug control. Not only are they practical once the sun goes down, they look nice too.
Giving a nice tropical vibe to your garden party, they are a great, fun way to bring some light to your party, and to make sure the bugs stay away.

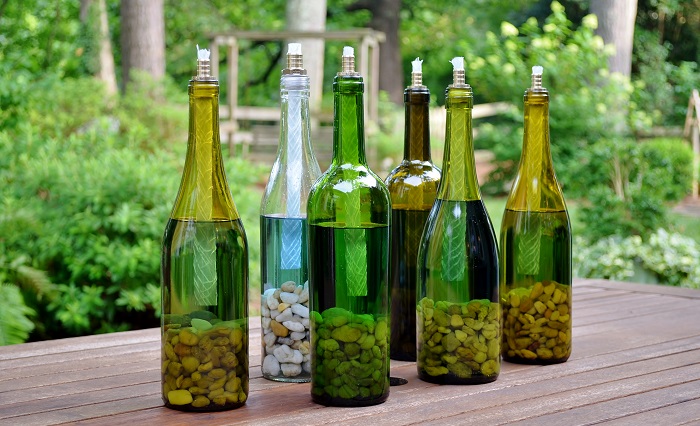
To take things up a notch, we love the idea of a wine bottle tiki torch. What could be more fun than that? If you are looking for a fun way to add some special touches to your next garden party, this is it!
If you are hosting a fun garden party – maybe a bachelorette party, bridal shower, or fun girls night, you need to make these wine bottle tiki torches.
Best of all, they are pretty easy to make, and if you are like us, it probably won’t be a problem to gather some used wine bottles! We aren’t judging!
The one major downside to hosting a party outside is the bugs. Especially if you live in an area where there are a ton of mosquitos, you need to have some sort of way to keep the bugs away if you want to spend more than 5 minutes outside. Tiki torches will do just that!
Here are some quick step by step instructions on how to make wine bottle tiki torches!
How to make wine bottle tiki torches – tutorial
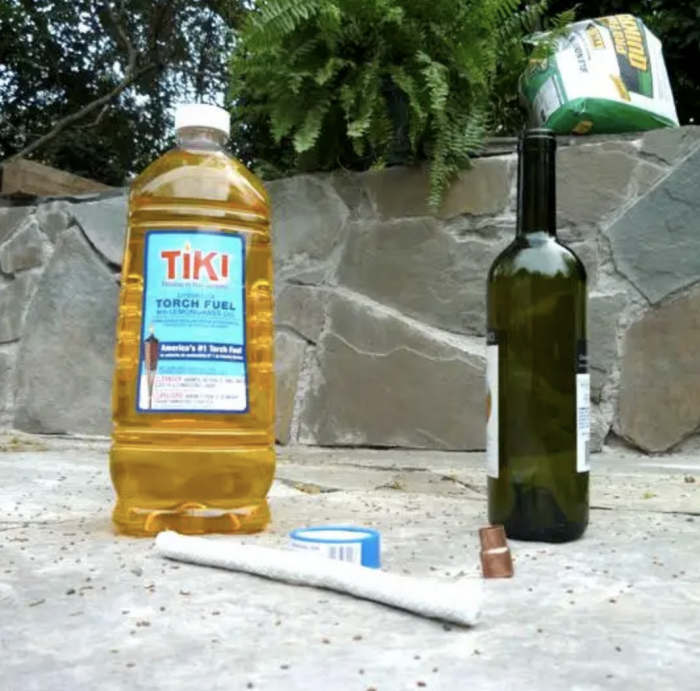
Items You’ll Need:
We are sharing the steps for creating one tiki torch. If you want to make several, keep that in mind when purchasing these items!
✓ Wine bottle: Any wine bottle should do, just make sure it has a fairly standard neck opening so that you can fit the wick and other materials inside.
✓ ½” by ⅜” copper coupling: This is what will hold the wick in place, so it’s important to get the right size.
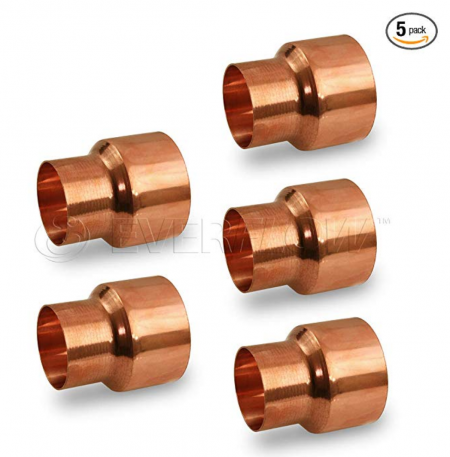
Get the Everflow CCRC0122-5 Copper Coupling Fittings Here
✓ Tiki replacement wick

Get the Lautechco Replacement Tiki Wicks here
✓ Nylon thread seal tape: This helps to seal the tiki torch and keep the copper coupling in place. How much you need will depend on the size of your wine bottle. Purchase one roll of tape and you will have plenty!
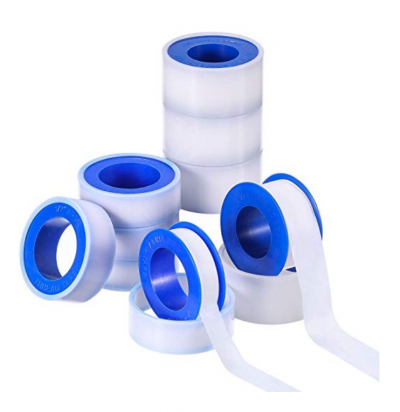
Get the Skylety 10 Rolls Thread Seal Tapes here
✓ Tiki torch fuel
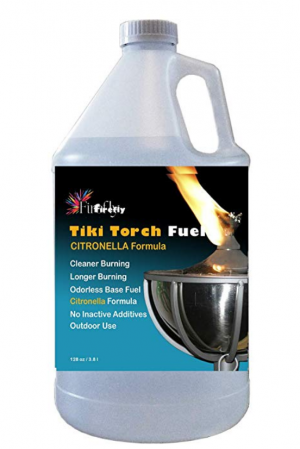
Get the Firefly Citronella Tiki Torch Fuel here
✓ Optional: Marbles; If you are going to use these tiki torches more as centerpieces that will sit on a table, it can be helpful to weigh them down a bit so that they don’t tip over.
If you are planning to hang the torches or mount them in some way, you won’t need to do this.
Steps:
→ Start off by making sure your wine bottle is washed clean and dried. We don’t recommend finishing a bottle of wine and then doing this project- safety first!
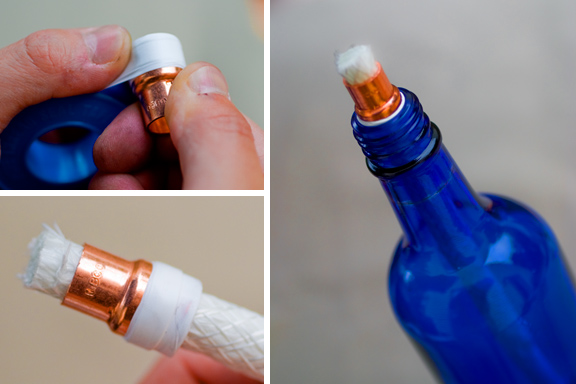
→ Take your copper coupling and start wrapping one end of it with the nylon thread seal tape. How many times you will need to wrap it depends on how wide your wine bottle opening is.
You want the coupling to fit in the bottle tightly so that it doesn’t accidentally slip into the bottle. You also don’t want to wrap it too many times that it does not fit in the bottle opening. Take time with this step to make sure it will fit snugly.
→ Take your replacement wick and feed it into the coupling, leaving about a quarter to a half of an inch hanging out at the top. This is the portion that you will light.
You want there to be enough there to light, but not too much (you don’t want a huge flame, that is dangerous). We recommend leaving no more than a half an inch of the wick out.
→ If you are planning to use your wine bottle tiki torches on a table top, now is the time to fill the wine bottle with marbles. You don’t need to fill the entire bottle – only fill the bottom to give it some added weight.
→ Now you need to fill the bottle with your tiki torch fuel. We recommend using a funnel for this so that you don’t spill the fuel outside of the bottle.
Fill the bottle most of the way up, making sure there’s enough space for the wick to fit in without the fuel overflowing.
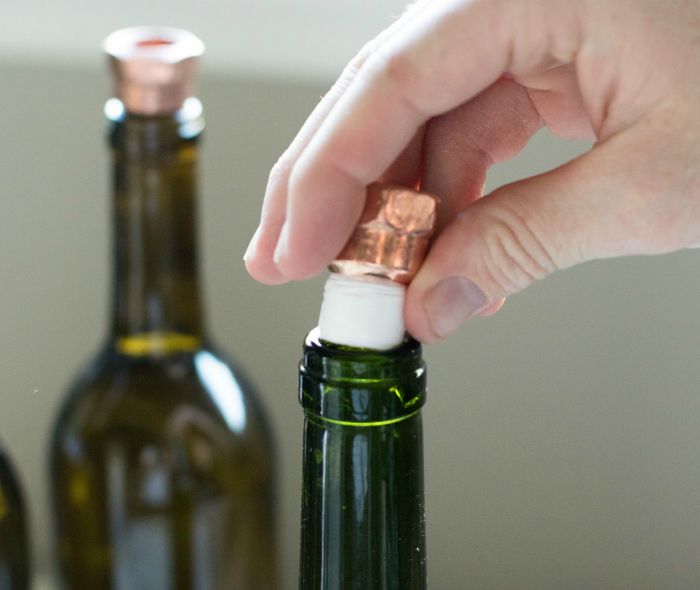
→ Insert the wick and coupling making sure it fits into place nicely. It shouldn’t feel loose like it might fall in the bottle.
→ The wick will start to absorb the fuel and this will help ensure the torch continues burning. Give the wick time to absorb the fuel before you first light it. We recommend waiting a minimum of 30 minutes before lighting.
Video Tutorial
*a word of caution: This is a fun DIY party decoration project and will make a great addition to your garden parties, but because you are dealing with an open flame and glass, make sure you are being incredibly careful!
Make sure your tiki torches are not near children and that they are super secure and won’t accidentally tip over (you don’t want to start a fire!) Also, always make sure you use these tiki torches outdoors only- never indoors.
Wrapping Up
These wine bottle tiki torches are the perfect addition to any garden party you plan on hosting. These will give such a personal, fun touch to your party, everyone will be talking about them!
All it takes is following these couple of easy steps and you’ll have your new favorite outdoor lighting and bug control option.
Even if you aren’t super crafty, you can put together these cute tiki torches. Best of all, your friends and family will be so thankful to have something that helps them see and keep them free of bug bites!
Pin for later