How to Make a Paper Airplane (Just for the Fun of It!)
")
No matter if you are gifted at origami or not, it’s likely you’ve tried to make a paper airplane in the past. We can certainly say that although we always tried our hardest, our paper planes always failed.
Even though they might seem simple at first, there are plenty of different tips and tricks you can use to create fast and far-flying paper airplanes.
Below are our favorite tutorials to use for days when you want to get a little creative and have some extra paper lying around your house.
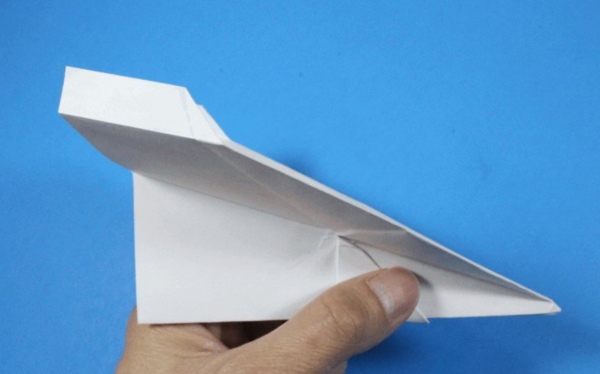
1. The Bulldog Dart
Much like its name suggests, this paper airplane tutorial is fantastic for making a darting plane that will shoot from one end of the room to the other. With that said, it’s one of the more basic designs but it isn’t recommended for exceptional style.
We highly recommend using this tutorial as a warm-up for the more complicated tutorials below. It’s also a fantastic way to get your kids into the art of making paper airplanes.
✓ First, you’ll want to fold your paper in half lengthwise and then unfold it. This will be the very first crease that you’ll use as a guideline for the next folds.
✓ Taking the two top corners, fold them so that they meet together at the center crease. This is one of the most common steps, as you’ve likely done it before when making paper airplanes as a kid.
✓ Turning the plane over, take the corners and fold them again so that they meet a the middle crease.
✓ Using the top point, fold it down so that the tip meets where the other two folds come together.
✓ Next, fold the entire plane in half and this is what will create the snub nose on the plane.
✓ On the right side of the plane, fold down the wing so that it makes a straight line across from the snub nose. You can then flip the plane over and do the same for the left side.
✓ At this point, your plane should be more than ready for flight!
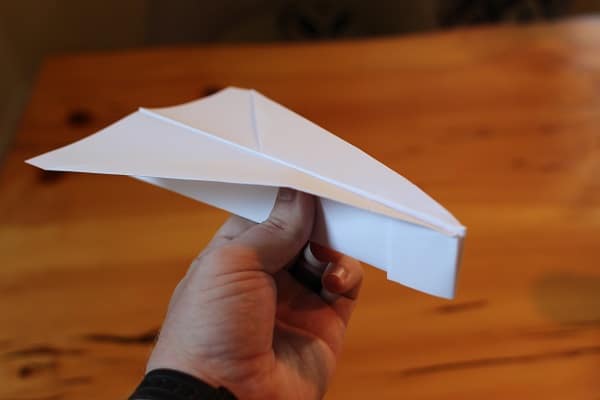
2. The Professional
With an appearance that is quite similar to traditional paper airplanes, The Professional is highly recommended as an intermediate tutorial.
It’s not as simple as the snub nose but certainly isn’t as complicated as some of the other paper airplanes on this list. It rates highest for speed and distance but isn’t recommended for stunts.
✓ Fold the top half of your paper to meet the bottom half.
✓ Bring the bottom right corner of the top half of the paper to the center. Repeat this process for the left corner as well. At this point, you should have a triangle that is upside down.
✓ Take the top right corner and fold it to the bottom point of the triangle, repeat this step for the left corner as well.
✓ Unfold both of the two corners you just folded and make sure you have two diagonal creases on both sides of the paper.
✓ Taking the very top corner of each side of the paper, fold them down to create a second diagonal crease.
✓ Taking the bottom point of the triangle, fold it upwards so that it “holds” both folded corners together.
✓ Turn the paper over and fold the left half to the right half, making sure the ends meet perfectly. You can then fold each edge down to create a wing for both sides.
✓ Turn the airplane over again and fold the wings so that they meet perfectly together. You can then take the edge of each wing and fold it down to create a fin.
✓ Unfold the wings and make sure the fins are pointing upwards before allowing your plane to take flight!
3. The Stealth
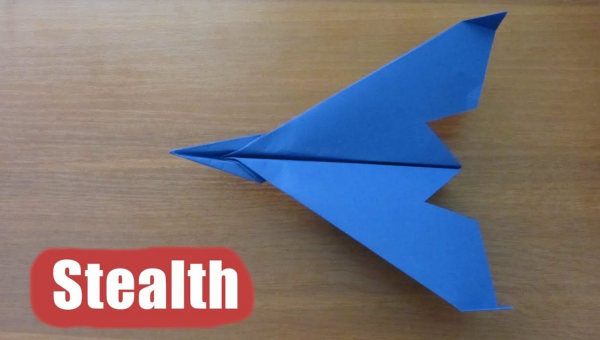
Compared to The Professional, The Stealth is a great beginner project that will give you maximum flight. It’s one of the least useful paper airplanes for tricks, but it’s surely one of the best for distance.
Not to mention it looks fantastic when you have it all put together. This is another tutorial that we highly recommend for kids who are just starting to get into building their own paper planes.
✓ Taking your paper, fold it in half vertically and then unfold it.
✓ Take the top right and top left corners, folding them down together to meet at the center crease.
✓ Fold the peak of the plane towards you so that it’s approximately ¾” from the very bottom of the paper.
✓ Take both of the new corners and fold them so that they meet at the center line.
✓ The remaining tip can then be folded over the two flaps in the middle to help hold them in place.
✓ Take the bottom edge of the plane and fold it away from you.
✓ Take each of the wings and fold them down approximately 1” from the bottom of the plane. You can also take the sides of each wing and fold them so they are about ½” tall.
✓ Using scissors, you can cut two small slits at the bottom of each wing to create tabs that you will then fold up.
✓ We also recommend using double-sided tape on the inside of the plane’s body. This helps to create the most seamless design, you will also find that taping the body together will make it much more aerodynamic. This is a fantastic trick for all different types of paper airplanes you create.
✓ Now your stealth plane should be ready for flight.
When it comes to finding ways to fold paper planes, you can guarantee there is a limitless list of different folding methods and techniques.
As a hobby that many people around the world take seriously, it’s a soothing and creative activity for the whole family. Regardless of your skill level, we highly recommend testing all three of these tutorials out to determine what your skill level is.
When you improve, you can begin to look into more advanced paper airplanes such as the Swashbuckler, the Nakamura Lock, and even the Star Crusher. For even more excitement, consider decorating the airplanes and using them as display pieces in your home.
Pin for later