Folding an Origami Gift Box Like a Pro!

When you feel like you’re ready to try your hands at something new and creative, there’s a whole world of possibilities open to you, especially when it comes to gift-giving. You can easily find an assortment of handmade gifts, however, what about the box that the gift comes in? Origami gift boxes look like they take a lot of time and they’re certainly outside of the norm when it comes to gift giving for a variety of occasions. However, the truth is, with the right instructions, these boxes are far easier to achieve than you would think.
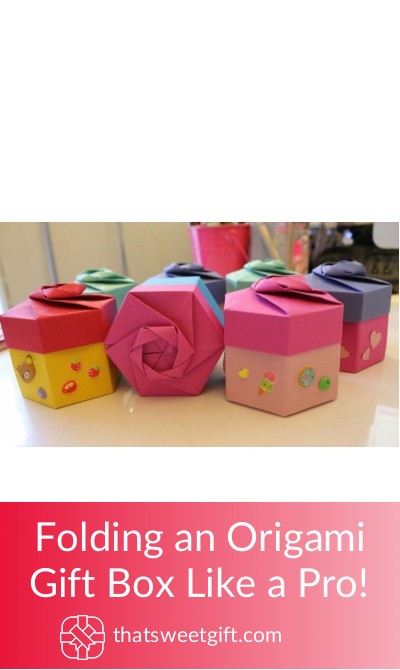
In this guide, we’ll give you a step-by-step written tutorial as well as a video tutorial on how you can make your very own origami boxes for a special gift for a friend or a family member.
A Tutorial on How to Fold an Origami Box
This tutorial might take a little bit of practice, however, the more time you spend refining your skills, the easier it will become. Origami is more than an activity that you can do for fun, it’s a whole world of unique and skillful crafts that will take a little bit of patience and practice.
Step 1: Gather your materials
The first thing you’re going to need to do is to find all of the materials you’ll need for a 4 ¼ x 4 ¼ box. Ideally, you’re going to want to buy different types of scrap paper, depending on how many boxes you need to make. Ensure that you choose a variety of different colors and patterns so that every box can look different and it gives you more options for pairing colors and patterns together.
In terms of size, you’re going to want two 12” by 12” sheets of scrapbooking paper and the thicker the paper is, the easier it’s going to be to work with.
Step 2: Making the first folds of the box
Once you’ve chosen the two sheets that you want to use, you’re going to want to choose the sheet that will be dedicated for the box, rather than the lid. You’ll then want to fold the paper in half going horizontally and then unfold it, then fold it in half vertically and unfold it.
At this point, you should have a cross-crease pattern and then you’ll need to take each corner and fold it into the middle.
Step 3: Folding the Bottom and Top
Next, you’re going to want to take the top and bottom portions of the paper and fold them so that the edges meet right into the middle. You can then unfold the halves.
Step 4: Folding the Left and Right
Similar to step 3, you’re now going to want to take the left and right halves of the paper and fold them so that their edges meet in the middle.
Step 5: Creating the Box Sides
Pick two corners that are diagonal from one another and open them, leaving the other two corners alone. You’re then going to want to use your fingers to edge the corner folds inwards and pull the third edge up. You can then take the top flap and tuck it in to create one side of the box and repeat this process for the other side.
Depending on the type of items you intend on storing in your origami box, you might want to add some glue when tucking in the flaps to further secure the box.
Step 6: Folding the Bottom
Now it’s time for the base, which is when you’re going to want to cut the other sheet of paper to approximately 11.5” by 11.5” and repeat steps 1 through 4 to fold a base for the box.
A Tutorial on How to Fold an Origami Box Lid
If you’ve decided that your special gift box needs a lid, creating one is simple as all you’ll have to do is follow the previous steps for creating the origami box. This will give you the easiest way to create a lid that will fit perfectly with the size box that you had previously created.
Video Tutorial for Creating an Origami Box
Origami tutorials are far easier for beginners to understand with the help of visual cues, which is why this phenomenal tutorial will surely help you get an idea of how to make the perfect origami gift box for any occasion.
The Benefits of an Origami Gift Box
You might be wondering, why would I want to spend all of that time trying to create a gift box when I can easily buy one from the store? The answer is simple, it’s a different way to present your gift and learning origami could be one of the greatest hobbies you ever picked up.
You’ll find that origami is a great activity for kids and the more experience you have with it, the easier it will be to teach your children. You’ll be able to set them up at a table and have them construct their very own gift boxes for their next friend’s birthday party.
Another great advantage to origami gift boxes is they can help you to save money, as all you need to do is buy scrapbooking paper which is readily available from anywhere. With a single pack of paper, you can make up to 50 boxes for a wide variety of occasions that will surely show off your creative skills.
You’ll also find that if you’re in a crunch for time and aren’t able to buy a box for a gift, knowing how to make one can be quite useful so you can avoid the uncomfortable feeling of giving someone an unwrapped gift.
No matter what the occasion, you can create customized origami gift boxes for anyone, as long as you choose the right paper. By harnessing this unique skill, you’ll not only be able to teach yourself something new that will prove to be useful in the future, but you can also teach everyone else how to make the most of some paper that they might have lying around their house.
Pin for later