How to Decorate a Plain Paper Gift Bag: Quick Tutorial and Materials to Use!

Plain paper gift bags certainly are a bore, especially if you’re the type of person that likes to let their creativity shine through all of the presents that they give to friends and family members. Whether you’re trying to be budget-conscious throughout the year or if the only gift bag you have on hand is plain ones, there are plenty of DIY options that you can use to dress them up and turn them into something spectacular. In this guide, we’ll not only go over some of the best ideas to transform plain paper gift bags into a work of art, but we’ll also provide tutorials to help you through the process step-by-step.
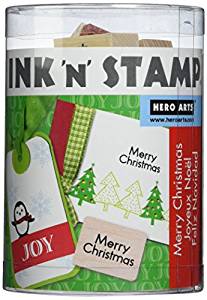
1. Stamped Gift Bags
Stamped gift bags are a great option as they can be used for a wide variety of holidays ranging from birthdays to Christmas. Also, they’re most likely one of the simplest ways to dress up a bag that anyone in the family can do, which makes it a phenomenal project for the kids.
What You’ll Need
Paper gift bag
Stamp ink (color of your choosing)
Stamp (pattern of your choosing)
Tissue paper (color of your choosing)
Instructions
Step 1: Gather your supplies
First, you’re going to want to find a paper gift bag and then choose your stamp ink. It’s important to remember that the ink of the stamp should be easy to see against the color of the bag, for example, the silver ink would be ideal for a black or dark colored bag.
You’re also going to want to find a stamp at your local art store with a pattern that resembles the holiday and also tissue paper that fits in with the colors of the bag and ink.
Step 2: Prepare the stamp
Now it’s time to prepare your stamp and you can do this by opening the stamp pad or pouring the ink onto a protected surface that the ink won’t leak or bleed through. Test the stamp on a blank piece of paper before using it on the bag and ensure that when it comes time to stamp, the entire bottom of the device is covered in enough ink.
Step 3: Stamping the bag
Now you have the ability to stamp your chosen pattern in any way you desire, just make sure that you make it look professional more than kitschy, as you won’t want the bag to look too homemade. Allow time for the ink to dry and then add in your gift with the colored tissue paper and you’re good to go!
2. Spray Painted Foliage Gift Bag
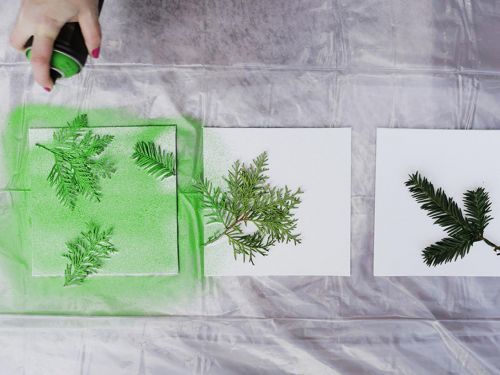
If you’re looking for a design that is more adaptable to older audiences, this is one project that you should at least try because it’s very unique and it’s quite unlikely that you’ve seen anything like it before. The spray-painted foliage gift bag is a phenomenal way to transform an ordinary paper bag into something elegant and exotic that the recipient will surely appreciate.
What You’ll Need
Paper gift bag
One piece of foliage (we recommend a sprig of pine or fern)
Repositionable adhesive spray
Spray paint (color of your choosing)
Instructions
Step 1: Positioning the foliage

The first thing you’ll need to do is lay out the paper bag and spray the entirety of the foliage with repositionable adhesive spray, as this is what will keep the branch or sprig in place while you are spray painting. The adhesive also gives you the ability to move the foliage around in order to get the ideal positioning.
Step 2: Spray painting the bag
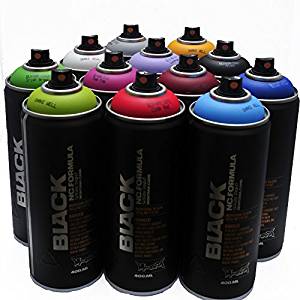
Once you have achieved the ideal direction for the foliage on the bag, you’re then going to want to take your chosen spray paint and carefully spray the entire bag with the color, making sure that you go over the foliage as well.
Step 3: Allow drying time
It’s important that you leave a sufficient amount of drying time, as you won’t want to peel back the foliage too soon. Once the spray paint has successfully adhered to the bag, you can then take away the foliage and marvel at your masterpiece. The entire bag will be the color of your chosen spray paint with an outline of your foliage in the original color of the bag.
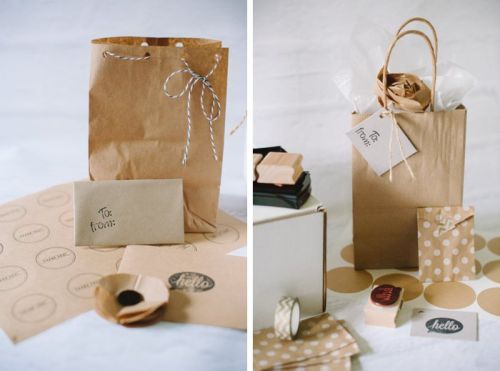
3. Cute Bow Gift Bags
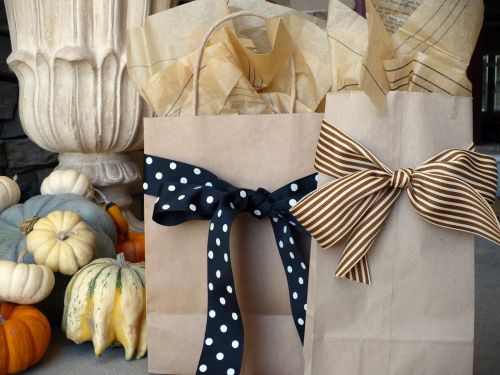
As another incredibly simple way to make the most out of a basic paper gift bag, there’s always the ability to dress it up with minimal effort, however, its final look will be exactly as you imagined. You’ll need very few materials, most of which you can buy from the dollar store, and you’ll have a professional-looking gift bag at the end of the project.
What You’ll Need
Paper gift bag
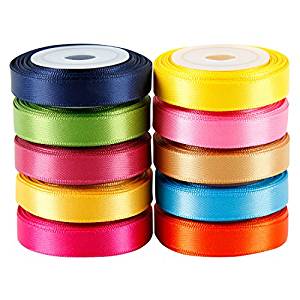
Ribbon (color of your choosing)
Glue
Scissors
Instructions
Step 1: Measuring and cutting the ribbon
The main purpose behind the bow gift bag is to make sure that you can put a bow around the entire bag, and as such, you’re going to need to measure the ribbon to make sure that it not only goes around the entire bag but that there’s also enough leftover material to create a bow. Once you have the right measurements, you can cut the ribbon.
Step 2: Adhering the ribbon
Now, you’re going to want to take the backside of the ribbon and add your adhesive, we recommend a glue stick or glue dots, as they are the easiest to control. Make sure that the ribbon is glued down evenly around the entirety of the bag without any droops in the material.
Step 3: Finish with a bow
For the final step, you can tie a bow at the front of the bag for a little bit of extra flair. There are plenty of ways that you can tie it depending on your personal preference, you can even curl the ribbon with your scissors for an even cuter finished product.
Final Thoughts
Plain paper bags open a whole world of opportunities when it comes to gift wrapping and you won’t ever have to worry about giving a boring and simple gift to a friend or family member again. With the help of these great tutorials, you’ll surely be prepared for your upcoming event.
Pin for later
