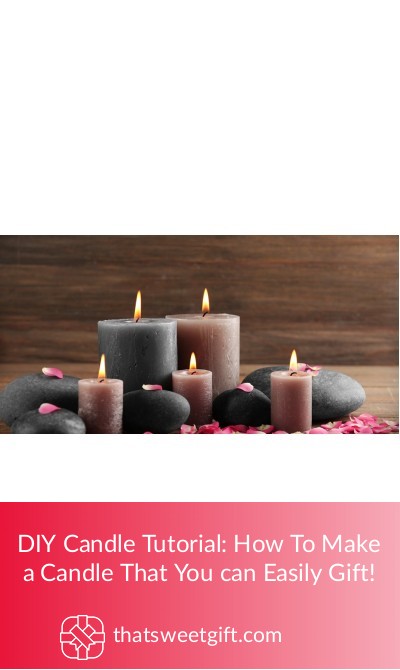
DIY Candle Tutorial: How To Make a Candle That You can Easily Gift!

Wondering what the perfect gift to bring to a special occasion is? Perhaps it is a retirement party, housewarming party, a bridal shower, or a birthday. No matter the occasion, figuring out the perfect gift can sometimes be a challenge. We find that there are certain gifts that just seem to always work- and one such gift is a candle!
Candles are perfect gifts – everyone loves them, they smell great, and make for great decor as well. With the exception of students moving into dorms that don’t allow open flames, this is a gift that is perfect for just about anyone. Have a white elephant or Secret Santa party coming? Why not give a candle! You don’t know who you are shopping for, but you can be sure that they will enjoy a candle.
If you feel like purchasing a candle is taking the easy way out, we’ve got the perfect solution to take your gift to the next level: Make it yourself! That’s right! Did you know it is actually pretty easy to make your own candles? While some DIY gifts may seem less than stellar, this is an excellent option that anyone will love and appreciate. Best of all, the final result is a totally useable candle that smells great!
If you feel like you’ve got to have experience and certain skills to make your own candle, you are about to be mistaken! Follow these easy steps and you will end up with a perfect candle that makes for a great gift. You’ll love it so much, you might just keep it for yourself! We suggest planning to make numerous- they are sure to be a hit!
What You’ll Need
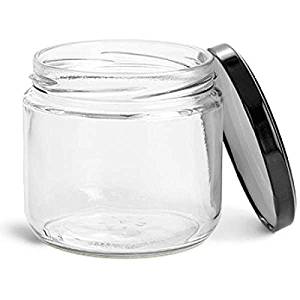
✓ Glass containers: To hold the candles, obviously!
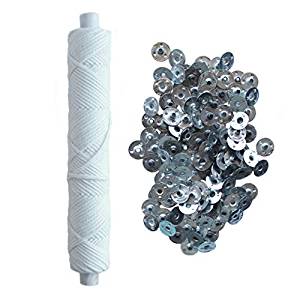
✓ Wick rope: This is for your candle wick. Make sure the wick you select is wide enough to ensure your candle will burn nicely.
✓ Wick tabs: These attach to the bottom end of the wick to keep it secure
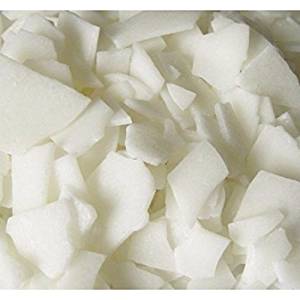
✓ Wax: Obviously! There are several kinds of wax you can choose from, we prefer to use soy wax as it burns cleaner and longer, but you can also use paraffin wax which is slightly cheaper.
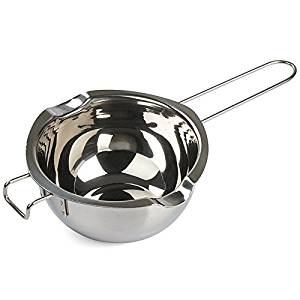
✓ Double boiler: This is what you need to melt your max. This is the biggest investment you will make in the candle making process, but you can purchase one for relatively cheap. Alternatively, you can use two pots and make one yourself, just make sure you get two that are the right size that they fit nicely on top of each other (we’ll explain more below!).
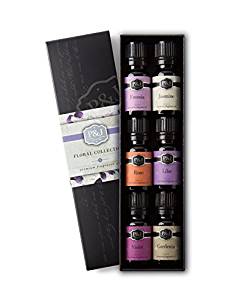
✓ Fragrance oil: This is needed to give your candle a scent. You can use essential oils, but they tend to be less effective. Instead, you can purchase actual candle fragrance that is made exactly for this purpose. Select whatever scent you like!
✓ Thermometer: This is needed to ensure your wax reaches the appropriate temperature when melting.
✓ Flat pencil: This is needed to attach your wick to while it is suspended in your wax. A flat pencil is easier to work with so that it doesn’t roll off the edge of your glass container. You can also use a chopstick if you’ve got one!
✓ Superglue: This is optional, but needed if you need to secure your wick tab to the bottom of your candle.
What You Need to Do
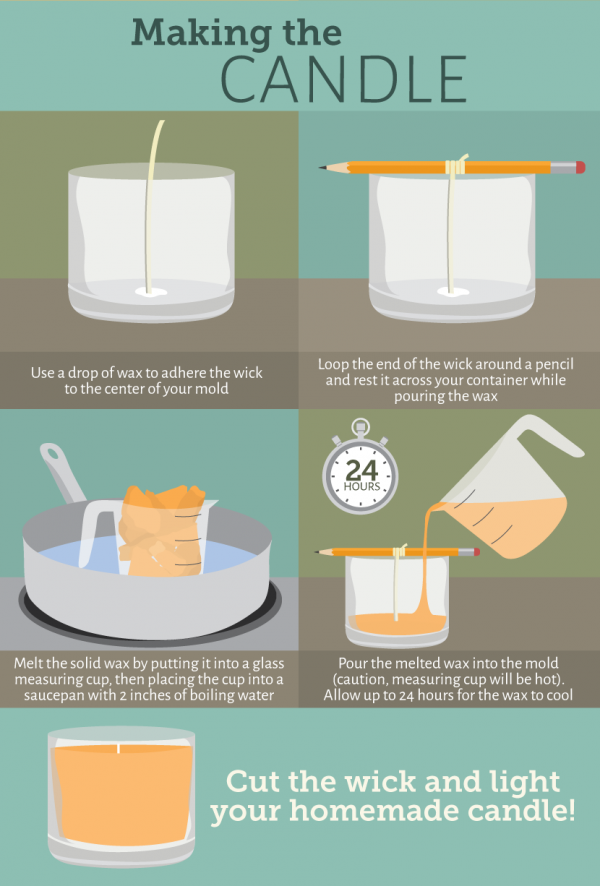
First up – you need to create your wicks. Keep in mind that you can purchase premade wicks from your local craft store, but make sure you select the correct height that will work with the containers you will be using. Sometimes it is easier to create your own so that you can be sure the height is what you need. Cut the correct amount of wick (we suggest cutting a bit more than the entire length of your candle – you can trim it down at the end!)
Next, attach one of your wick tabs to the end of your wick and squeeze it with some pliers. If you purchased a wick tab that has a sticker on the bottom, you can use that to place the tab at the bottom of your glass container. If the tab doesn’t have any adhesive, use superglue! Make sure the tab is placed in the center of the container.
Now it is time to melt your wax! This is where you need your double boiler. You cannot melt wax in a pan directly over heat, the wax will get too hot. A double boiler will work perfectly. If you don’t have one, consider placing two pots on top of each other. In the bottom pan (that will be directly over the heat) fill it up about 20% full with water and bring the water to a boil.
Then place your additional pot or bowl on top of that pan, making sure the bottom does not come in contact with the water. Reduce the heat to a simmer. If you are using a double boiler, pour some water in the bottom of the pan and then pour the wax into the double boiler and heat it up. If you are creating an 8 ounce candle, you should use about half a pound of wax. Use your thermometer to monitor the temperature of the wax. Stir occasionally to ensure all of the wax melts evenly. It should only take around 10 or 15 minutes!
Next, remove your wax from the heat and let it cool slightly. Now is the perfect time to mix in your fragrance! We suggest adding about half an ounce of fragrance for an 8 ounce candle. Stir it in well so that the scent is evenly distributed. Let the wax cool until it is around 130 degrees- that should just take a few minutes.
Once the wax has slightly cooled, it is time to pour it in your container! Pour the wax in carefully using one hand while holding your wick in the other- make sure the wick stays fully upright and in the middle of the candle, but don’t pull too hard! You don’t want it to pull off of the bottom of the candle.
Now that all of the wax has been poured in, it is time to grab your flat pencil or chop stick to secure your wick to while the wax fully hardens. Loop it around or attach it in some way to the pencil and balance the pencil on the edge of the glass container.
Let it cool! As the wax cools it will harden and form your candle. We recommend letting it cool and harden for several hours. The last step is to trim down your wick leaving about a quarter of an inch exposed. Too long of a wick will produce a flame that is too big!
Light the candle, and enjoy! Or, if giving as a gift, wrap it up and give to a friend or family member and have them enjoy!
Wrapping Up
See, that doesn’t sound so bad does it? In truth, candle making is much easier than it may seem to be. You only need a few items and best of all, you can create a variety of scents to match the season or person you are giving the candle to! From sweet floral scents, to warmer fall scents, and everything in between, you have the power to create what you want!
Who will the recipient be of your first candle? It might just become your new gift-giving tradition! Enjoy!
Pin for later