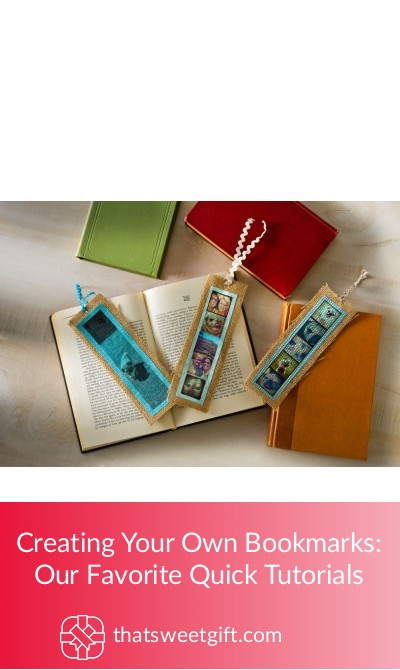
Creating Your Own Bookmarks: Our Favorite Quick Tutorials

The only difficult part of reading is being able to keep track of where you left off. It can be tempting to fold the corners of your book down as a page marker, but this inevitably damages the book over time. Instead, it’s recommended that you find a bookmark that you can use. Instead of spending money on premade designs, why not take a more creative effort and make your own at home? DIY bookmarks are not only a way to show off your creativity, but can also double as a fantastic present for a bookworm in your life.
Below are our favorite quick tutorials that you can use to craft your very own bookmark in a limited amount of time.
1. Elastic Bookmark
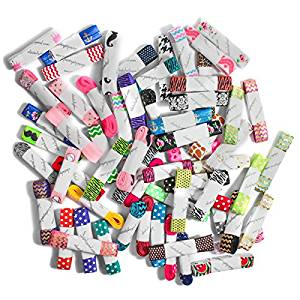
For this project, you’re going to need to get printed elastic, super glue, and scissors. You can easily find printed elastic at your local craft store or in a crafting aisle at a big box store. It typically comes on a spool that is similar to the spool used for a ribbon.
Step 1: Measuring the Elastic
The first thing you’ll need to do is make sure that you cut the perfect amount of elastic. The point of this bookmark is for it to wrap around the pages that are left and the back cover of the book. So, you’re going to want to choose an average sized book for reference.
Take the elastic and wrap it over the pages of the book as well as the back cover. You might have to stretch the elastic a little bit and that’s okay, as you’re going to want the bookmark to be flexible. Using your two fingers, hold both halves of the elastic at the bottom and cut the elastic at the right length.
Step 2: Gluing the Elastic Together
It’s now time to create the bookmark. Take one end of the elastic and fold it into the middle, doing the same process with the other end of the elastic. You can then glue the two halves together so that you have essentially created a full elastic band. It’s important that you leave more than enough time for drying, as you won’t want to use the bookmark too quickly and have it break.
Once dried, you can easily use the bookmark whenever you please. The best part about this tutorial is that you can keep the bookmark on the back or front cover of the novel. You won’t ever have to worry about losing it!
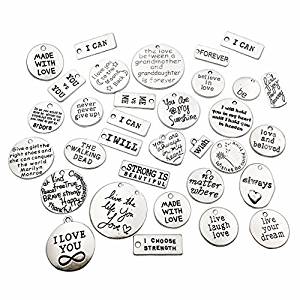
2. Charm Bookmark
If you’re looking for a bookmark that offers a little more bling than a traditional elastic, this is a fantastic tutorial for you. We also love this idea as a personalized gift for a friend or a family member. For this project, you’re going to need ribbon, a pair of scissors, super glue, and a charm of your choosing. If you’re looking for a more budget-friendly option, consider repurposing an old charm from a piece of jewelry that you don’t wear anymore.
Step 1: Measuring the Ribbon
The first thing that you need to do is measure the ribbon to make sure it’s the right length. You’re going to want to fit the ribbon into the middle of your reference book and then cut any excess material off. You can make the bookmark as short or as long as you desire.
Step 2: Adding the Charms
Now that you have the perfect ribbon length, it’s time to add on the charms. Thread the bottom half of ribbon through the ring of the charm, leaving about 1 inch of excess ribbon at the end.
Take this excess ribbon and fold it upwards, using your super glue to glue the excess to the main piece of ribbon. It’s recommended that you use a paper clip to keep the glued pieces together just so they stick together strongly.
Step 3: Finishing the Bookmark
Once the charm is secured, all you have to do is put a knot in the top half of the ribbon and your DIY bookmark is ready to be used!
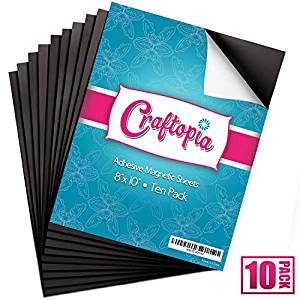
3. Magnetic Bookmark
Magnetic bookmarks are multipurpose tools. You can use it while you’re reading and once you’ve finished a book, you can put it on a whiteboard or your fridge. For this tutorial, all you’re going to need is scrapbooking paper with a print of your choosing, stickers, a pair of scissors, super glue, and a sheet of magnets.
Step 1: Decorating the Craft Paper
The first thing you’re going to want to do is to decorate your craft paper with your selected stickers. This will give you an idea of the general size of the bookmark before you measure it against your book. Once you have all of the stickers placed on the paper, you can then grab your reference book and measure the craft paper accordingly.
Step 2: Adding the Magnets
Once you have the fully cut bookmark, it’s time to attach the magnets. The best option for this step is to have a full sheet of magnet paper that you can cut to fit the size of your bookmark. However, you can also repurpose magnets that you might already have around the house.
Using your super glue, glue the magnets to the back of the bookmark. This will make it a little heavier, which is always ideal for making sure the bookmark doesn’t accidentally fall out of your book.
Step 3: Covering the Magnets
After giving the magnets more than enough time to dry, you’re then going to want to take your scrapbooking paper again. Place the bookmark on the paper and trace the bookmark, cutting the second piece of paper. Using your super glue, glue the second piece to the back of the magnets so that you have a professionally finished bookmark.
Final Thoughts
There are plenty of different ways that you can create your own DIY bookmark. From using old pieces of jewelry to using scrapbooking paper to create your own, the options are endless.
No matter if you want to create a new bookmark for every book that you read or if you’re making a gift for a friend, all you need is a couple of items and a little creativity.
Pin for later