The 5 Most Popular IKEA Hacks Fully Reviewed

IKEA is easily one of the most interesting furniture stores. They have an extensive collection of items for any place in your home and over the years, they only intend to add more products. From designing your very own kitchen from scratch to planning walk-in closets, there’s something for everyone.
What also makes IKEA phenomenal is how you can manipulate the products to suit your needs. Known as IKEA hacks, if you’re looking for innovative ways to repurpose furniture, you’ll love these 5 ideas.
1. DIY Patterned Ottoman
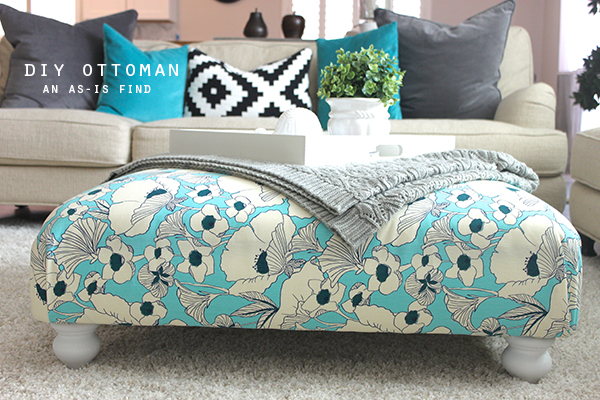
Ottoman’s are surprisingly expensive. Especially if you’re looking for a design that will work well with your existing furniture. Instead of spending hundreds of dollars on designer furniture, with this hack, you can make your very own ottoman. The best part? If you’re able to find the base piece in the “As-Is” section, you can save yourself a lot of money.
What You’ll Need
- Discounted ottoman (in any condition)
- A fabric of your choosing
- Staple gun
Directions
✓ First, you’ll need to find a discounted ottoman and we definitely recommend taking a look at IKEA’s “As-Is” section. In this area, you’ll find highly discounted products. Since you won’t have to worry about the overall condition of the piece, you can even choose one that has been stained.
✓ Using the fabric of your choosing, measure out the correct amount of material you’ll need to reupholster the ottoman. Once you have everything measured and cut accordingly, you can then move onto the next step.
✓ Wrap the material around the ottoman, making sure you don’t cover the legs of the piece. You’ll want to make sure that you hold the material taught, though not too taught as this can cause wrinkling. Once you have the desired tightness, use your staple gun to staple the material on the bottom of the ottoman.
2. DIY Farmhouse Dining Table
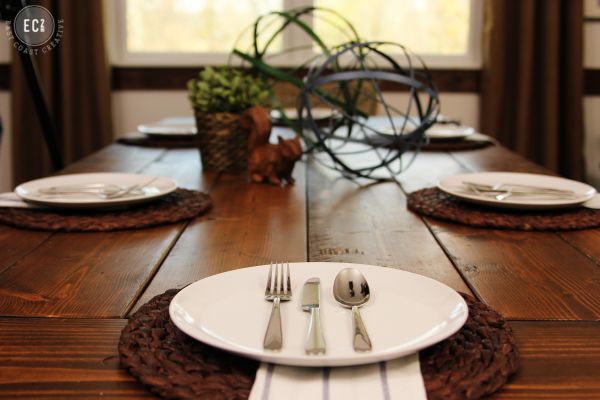
One of the most expensive pieces of furniture in your home is likely your dining room table. However, there are plenty of inexpensive ways for you to repurpose IKEA tables and make them look more elegant. This is especially true as there are several unstained dining tables to choose from.
What You’ll Need
- Two INGO pine tables
- A stain of your choosing
- 1”x3” pine plank
- Wood screws
- Drill
Directions
✓ You’ll first need to assemble the two tables using the instructions that came with them. Once assembled, place the tables on a sturdy and even surface.
✓ Using the 1”x3” piece of wood, screw it into the bottom of the two tables, so that they are affixed together. For added resilience, we recommend adding a second plank of wood.
✓ Grab any leftover wood screws and begin making marks in the wood. All farmhouse tables look slightly used and distressed, so you’ll want to make sure you’re able to create organic markings.
✓ The final step is to use your stain and apply 2 to 3 coats until the wood requires the depth of color you desire. Allow for a sufficient amount of time to dry and you have a perfectly remastered farmhouse dining table.
Watch the full tutorial here!
3. Modern Vanity
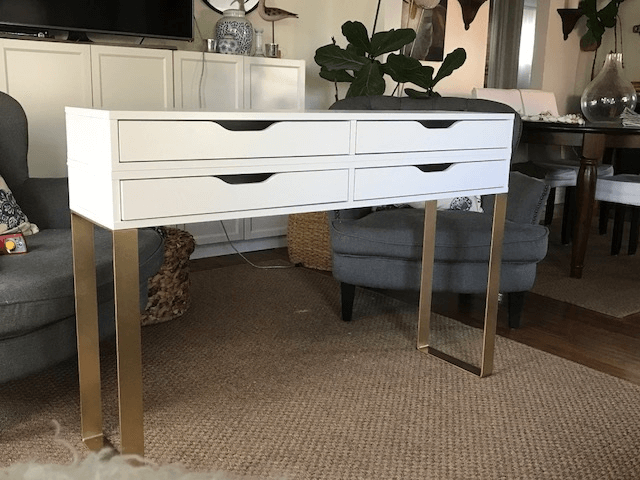
Vanities can be a fantastic place to keep all of your makeup and skincare. However, you could also use this IKEA hack to create a modern desk in your bedroom. It’s relatively simple and looks fantastic when completed.
What You’ll Need
- 2 Ekby Alex wall shelves
- Metal U-legs
- Metal spray paint (color of your choice)
- 2 ¾” flathead screws
- 8 ¾” (or longer) flathead screws
- 6 5/8” to ¾” flathead screws
- Drill
Directions
✓ Assemble the two Ekby Alex wall shelves using their included instructions. When building the second unit, don’t put the top onto the shelve or insert the drawers.
✓ Taking the 2 ¾” flathead screws, secure the unfinished wall shelf to the top of the finished wall shelf. Once secured, you can then add the top to the unfinished shelf. At this point, you should have the two units attached to each other.
✓ Using your spray paint, do a couple of even coats on your U-legs. You’ll want to make sure that all of the exposed areas have enough coverage. As soon as they are completely dry, you can move onto the next step.
✓ Turning the two units upside down, attach the legs using the remaining screws to make sure they are secure. The outer screws should be the longer screws, as they have a farther distance to travel through the wood. The inner screws should be shorter to avoid penetrating through the drawers.
✓ Turn the table right-side-up and now you should have a fully repurposed IKEA wall shelf transformed into a stunning modern vanity or desk.
4. Indoor Herb Garden
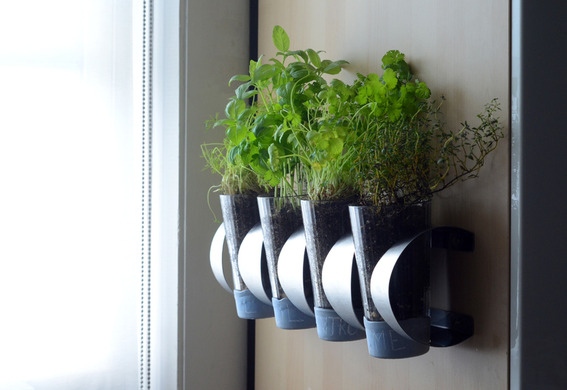
Creating your own herb garden can add beautiful greenery to your home and will help you to elevate your cooking. This is one of the simplest IKEA hacks on this list and will help to revitalize your kitchen with ease.
What You’ll Need
- IKEA Vurm
- 4 herb plants
- 4 handfuls of small rocks
- 4 pint glasses
- Latex paint (color of your choosing)
- Chalkboard paint
- White chalk
- Paper towels
- Wax paper
- Paintbrush
Directions
✓ Taking the pint glasses, dip the bottom half of each glass in your latex paint so that there’s about 1” of paint. Once you’ve allowed any excess paint to drip off, place the glass on a paper towel to absorb extra paint. Before it dries, transfer the glasses to your wax paper so that they can dry.
✓ Using your paintbrush, add a layer of chalkboard paint to the bottom of the glasses and give them overnight to dry completely. You might find that you’ll have to do a couple of coats to get the right opacity.
✓ Once dried, fill each pint glass with rocks and then transfer your herbs to the glasses.
✓ Taking the IKEA Vurm, place it horizontally on the wall using its mounting hardware. You’ll want to consider using studs to make sure the unit sits securely on your wall.
✓ Once secured, add in the pint glasses to each of the slots of the Vurm and you have your very own indoor herb garden!
Find the full tutorial here.
5. Wireless Bedside Table Charging Pad
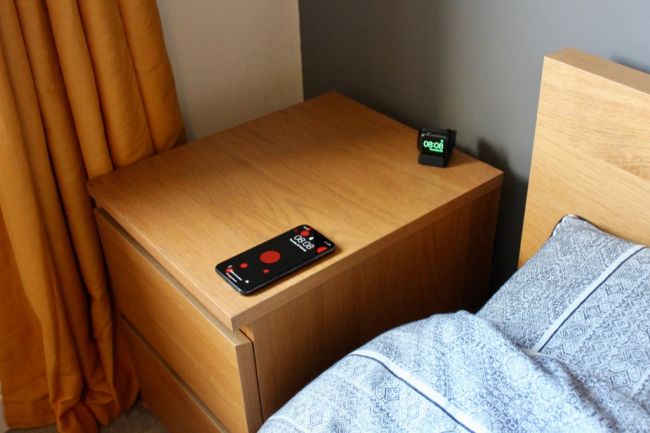
Using this simple hack, you can transform an ordinary IKEA bedside table into an innovative modern charging pad.
What You’ll Need
- MALM bedside table
- Wireless charging pad
- Panel pins
- Drill
Directions
✓ The first thing you will need to do is to remove the top of your bedside table. You can then take the panel pins, pushing them into the side panel of the table. Make sure you choose a height that will make sure the charging pad is pressed against the top of the table once reassembled.
✓ Once the pins have been pushed in, place the charging pad so that it’s resting on the pins. You can then take your drill and drill a hole in the back of the table for cables to run through.
Place the top back onto the bedside table and plug the wireless charging pad into the wall. You can then test the charger with your phone.
Tutorial available here.
Pin for later