4 of Our Favorite Cork Board DIY Projects

DIY cork boards are one of the best ways to create decorations for your home in an inexpensive way. Additionally, they double as a useful item that you can use for inspiration boards, pictures of friends and family, or even for to-do lists. With that being said, buying a regular cork board from a department store is going to look boring and bland.
We’ve found 4 of our favorite DIY projects that can transform something ordinary into something fantastic. The best part is that all you’ll need are a few items from your local store!
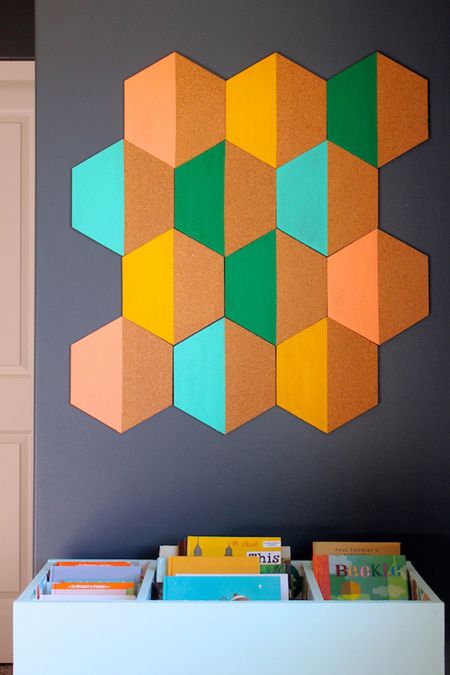
Geometric Cork Board
This guide for creating a geometric cork board gives you the opportunity to create a piece of art. It’s something that can easily be displayed on the wall and used as a decorative element. Alternatively, you could use it to spruce up your desk at work or be a functional piece of your home office.
What You’ll Need
- Painter’s tape
- Matte paint (color) of your choosing
- Small foam paint roller
Instructions
✓ Using the painter’s tape, create a geometric design on the front of the corkboard. The most important thing to remember is that the negative space where be wherever you place the tape. So you’ll want to choose where you want the natural color of the cork to show through.
✓ Using the matte paint that you’ve chosen and the foam roller, paint all of the areas where the tape isn’t placed. You won’t have to worry about painting outside of the lines, as the tape will protect the cork from the color bleeding.
✓ Allow a sufficient amount of time for the paint to nearly dry fully. You can then take the tape off. It’s recommended that you remove the tape when the paint is near-dry, as this will prevent cracking.
✓ Give the paint 24 hours to dry fully and then you can start pinning the board or hang it up on your wall.
Herringbone Cork Board
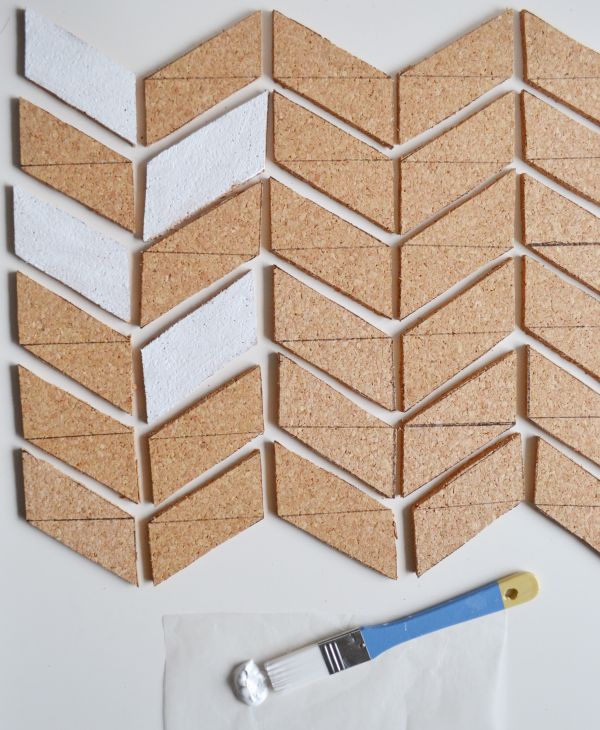
If you’re not too fond of the idea of painting a corkboard to make it unique, you’ll love this easy DIY. It takes a little more effort, however, the end result is something that will become the focal point of any room in your home.
What You’ll Need
- 1 sheet of corkboard material
- Hot glue gun and glue
- A frame of your choosing (with its backing)
- Ruler
- Pencil
- Scissors
Instructions
✓ Taking the sheet of corkboard material, use your ruler to measure rectangle shapes to your desired size. This will depend on the size of the frame you have chosen. When you glue the rectangular pieces to the frame, you’ll want to leave a small gap of space so the color of the backing can peek through.
✓ Once you’ve measured the rectangular shapes, cut them out accordingly and place them aside.
✓ Start to preheat your glue gun and lie out the frame that you’ll be working with. Once the glue is hot enough, grab your first rectangular piece of corkboard. Starting with the bottom left corner, glue the piece down to begin your herringbone pattern.
✓ Continue to glue the other pieces of corkboard to the frame, maintaining the same pattern. Be sure to leave a small gap of space in between each piece so you can slightly see the backing.
✓ Allow the glue to completely dry before hanging the corkboard.
Hanging Corkboard Coaster Organizer
If you’re looking for a way to repurpose cork objects that you already have around the house, this DIY is a great option. You likely won’t have to head out to the store to buy any extra items, which makes it a real time and cost saver. For the purpose of this tutorial, we’re going to use cork coasters, however, you can use any cork items you might have lying around.
What You’ll Need
- 1 sheet of heavy duty cardboard
- 1 sheet of material measured to fit the cardboard
- 3 cork objects (in this case, cork coasters)
- Hot glue
- Nails
Instructions
✓ First, you’re going to want to measure your heavy duty cardboard. It will be the backing for your organizer, so you’ll want to choose a size that will fit perfectly on your wall. You’ll also want to make sure to use scissors to create clean edges on the cardboard.
✓ Once the cardboard backing has been measured, you’ll then want to measure the material as well. Make sure that there’s ½ of an inch of overhang that can be wrapped around the back of the cardboard and pulled tightly.
✓ Using your hot glue, affix the material to the front of the cardboard, pulling it tight so that there aren’t any ripples in the fabric.
✓ Once the glue has dried, you can start to work with your cork coasters. Using the hot glue, apply enough to the back of the coaster so that it will easily stick to the fabric.
✓ Glue each coaster to the fabric covered cardboard and allow it to dry for a full 2 hours.
✓ Using your nails, affix the newly designed hanging cork organizer wherever you desire on the wall.
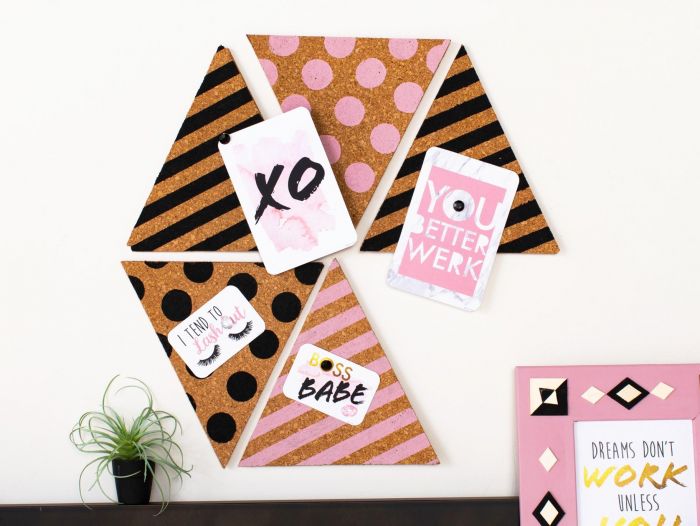
Inspirational Word Corkboard

The final DIY in this list is an inspirational word corkboard. We love this idea for a craft room or a kid’s playroom. However, it can also be a fantastic fixture for a bedroom. Similar to the other projects on this list, it’s incredibly easy to put together and is something that the whole family can do.
What You’ll Need
- Multiple sheets of cork
- Painter’s tape
- Matte paint (color of your choosing)
Instructions
✓ First, you’re going to want to think of the inspirational word that you want to make. For example, “Dream” would be a great idea for an inspiration board. Another example would be “Create” for a craft room.
✓ Using a pencil, trace out each individual letter on the cork, making sure that you use a ruler to make the most professional edges possible.
✓ With your scissors, cut out each individual letter, lay them out individually.
✓ For added decoration, use the painter’s tape to create a design that you’d love to have for each letter. We like the idea of creating a striped pattern as it’s modern and fresh.
✓ Using the paint that you’ve chosen, paint your chosen design and allow the paint to semi-dry, removing the painter’s tape and allowing the paint to dry fully.
Hang the letters as desired using thumb tacks or nails.
Final Thoughts
Traditional corkboards can be transformed in numerous ways to add unique art to your home. With the help of a few simple materials, you can create a beautiful and useful item that the whole family will use.
Pin for later