Create a Monogrammed Leather Key Ring: Quick Tutorial!

Leather is by far one of the most popular materials for purses, clothing, and accessories. It’s used by a variety of high-end designers and by unique accessory designers as well. If you’re looking for a trendy yet antique and urban gift for someone close to you, a monogrammed leather key ring is perfect. It gives you the ability to gift something that is personal and something that’s fashionable. Additionally, you’ll have a ton of fun making them for everyone in your group of friends!
With the help of this tutorial, you’ll know what materials you need to buy and the steps. All you have to do is use your creative skills to make a fantastic and memorable gift.
The Materials You’ll Need
First and foremost, let’s discuss the most important part of the project: materials. Luckily, leather key rings are easy to make with a few simple things that you can find online.
✓ 1” to 2” Leather Straps
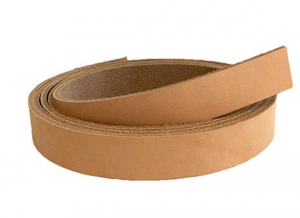
Get It Here
Leather straps are the most important part of this craft. You’ll want to choose the right color leather, as you’ll want to make sure that the imprinted leathers are easily visible. For this project, we prefer using a medium colored leather, as it’s rustic yet modern at the same time.
✓ Scissors
Your scissors are going to be used to cleanly cut the leather strap. As such, you’ll want to make sure that you choose a very sharp pair.
✓ Hammer
The hammer that you have will be useful for plenty of purposes. You’re going to need it to create the impressions and to seal the key ring with the metal rivets.
✓ Alphabet Leather Stamps
Another important part of the project is the alphabet leather stamps. These will be used to create the imprints and although it might seem intimidating at first, they are very easy to use.
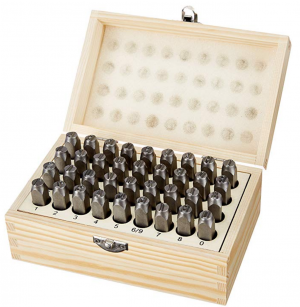
Get It Here
✓ Awl
Awls are unique tools but they are incredibly useful if you’re making holes in materials.
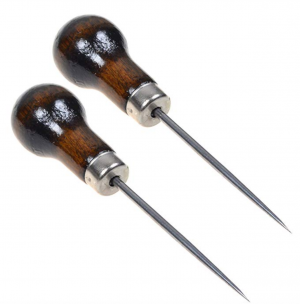
Get It Here
✓ Metal Rivets
To help affix both sides of the leather key chain together, you’re going to need metal rivets. Make sure that you choose high-quality ones, as they’ll be responsible for keeping the entire key chain together.
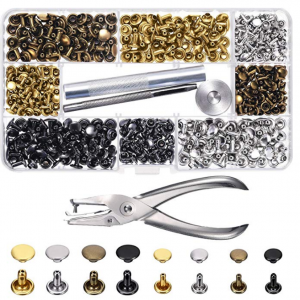
Get It Here
✓ Acrylic Paint
Acrylic paint is optional, however, we like the idea of adding a little pop of color to the leather.
✓ Painter’s Tape
You can use the painter’s tape in a variety of ways, such as using it to create patterns on the leather that you will then paint.
✓ Paintbrush
If you intend on doing detail work, you’re going to need a fine paintbrush, however, in this tutorial any old paintbrush will do. We’ve linked to a great paintbrush set so you can have plenty to choose from.
✓ Key Ring
Finally, you’ll need a key ring. We love the idea of using a silver colored key ring, as it pulls the brown of the leather together. However, brushed nickel or copper would also be a fantastic idea.
Get It Here
The Steps for Making Your Own Key Ring
It’s now time to delve deep into the steps you’ll need to follow to begin making the leather key ring. The tutorial is incredibly simple to follow, even if you’ve never made one before.
Step 1: Cutting the Leather Placing Your Holes
Before you start cutting the leather, it’s important to think about the size of the key chain. Our recommendation is to first pick the letters that you want to imprint. You’ll then need to measure the leather to the correct length. Also, make sure that you fold the leather in half so you know you’re cutting the perfect length. You can then use your scissors to cut the leather.
The next task is to place the holes that will be used to keep the key ring together. You’ll need to grab your awl and make a 1/8” hole on both ends of your leather strip.
Step 2: Stamping the Monogram
It’s always important that you follow the instructions for the specific stamping tools you’re using. This will help to make sure that you get the most prominent imprints possible. With most kits, all you have to do is place the stamp on the leather and then use your hammer to make the imprint.
Step 3: Paint Your Design
This is a completely optional step, though we find it adds a little more character to the key ring. If you’re looking for a more rustic appeal, you don’t have to follow through with this step. However, it can be a fantastic way to put a more original twist on the key ring.
Take your painter’s tape and place it approximately half an inch above the beginning of your monogram. You can then paint the rest of the exposed leather using your acrylic paint and your paintbrush. Make sure that you let the paint dry completely before removing the tape.
Step 4: Creating the Loop
Next, you’re going to need to create the loop using the leather strip and key ring. Take the key ring and slide it onto the leather and then fold the strip in half. Using your metal rivets, attach the leather together. Your metal rivets should also come with instructions and it’s best to follow what the manufacturer suggests.
Step 5: Add Keys and Wrap the Gift
At this point, you should have your fully finished key ring. You can now add keys and wrap the gift before giving it to your loved one.
Final Thoughts
What we love the most about a leather key ring is that it’s such an adaptable gift. It’s something small that you can throw into a family member’s stocking, or you can give it to a partner who is always losing their keys. It also makes a phenomenal gift for someone that you work with, as it’s personal but not too personal.
Additionally, you can use them yourself to help coordinate different sets of keys that you use on a daily basis. With the help of this tutorial, you’ll be well on your way to making sophisticated and useful gifts with ease.
Pin for later
