Our Favorite DIY Bookshelf Ideas That Will Only Cost You Pennies!

There’s nothing more beautiful than an authentic way to display all of your favorite novels in your home. However, bookshelves can be quite an investment, especially if you have a lot of different books to display. With the ability to repurpose or upcycle items from garage sales or your attic, you can create a stunning DIY bookshelf for a fraction of the cost.
Doing DIY projects can be fulfilling and fun. Here are some of our favorite DIY bookshelf ideas that will cost you pennies to put together.
1. Wood and Leather Plank
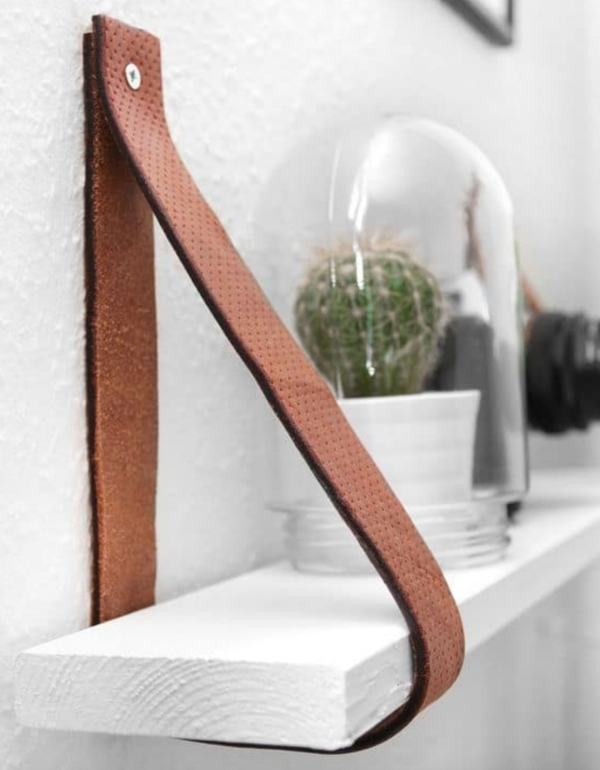
This project is very simple and doable with a scrap piece of wood and one of your old belts. The only thing you might have to purchase is a small can of paint or stain and screws.
✓ Step 1: Find an old plank of wood in your garage or basement that is long enough to fit on a wall and deep enough to hold your widest books. Using a paint color or stain of your choosing, paint the entirety of the shelf and give it time to dry thoroughly.
✓ Step 2: Using an old belt in your closet, cut it into two pieces that are large enough to wrap around the plank of wood and hang on the wall. With the help of superglue, attach the leather belt to the underside of the wood. Make sure there is enough length on either side of the shelf that can wrap up onto the wall.
✓ Step 3: Using two brackets and screws, attach the painted piece of wood to the wall. You can then use two more screws and attach the leather belt to the wall as well as an accent.
✓ Step 4: Test the stability of the shelf by displaying your heaviest books.
2. Repurposed Drawer DIY Bookshelf

If you have an old dresser or wardrobe lying around the house, why not take advantage of the drawers before bringing the rest of the unit to the garbage? This very easy DIY project only requires sandpaper, paint, brackets, and screws to create a unique place to display your favorite books.
✓ Step 1: Depending on the finish of the drawers, we highly recommend you use sandpaper to remove any glossy paint before adding new paint to the exterior. Once this layer has been removed, paint the drawers in any color you desire, making sure you get into all of the nooks and crannies. Once the paint has had a sufficient amount of time to dry, use the sandpaper to gently buff the outside of the drawers for a second time. This will give it a brilliant rustic appeal that adds to the aesthetic of the bookshelf.
✓ Step 2: Using brackets and screws, attach the drawers to create a stunning display. We highly recommend trying to organize the drawers in different ways, some lying horizontal and others vertical. This helps to add depth and dimension.
✓ Step 3: Once the drawers have been attached, we recommend attaching them to the wall as well, especially if you have children in your home. You can now fill all of the drawers with your favorite reads and trinkets.
3. Upcycling Old Bookshelves
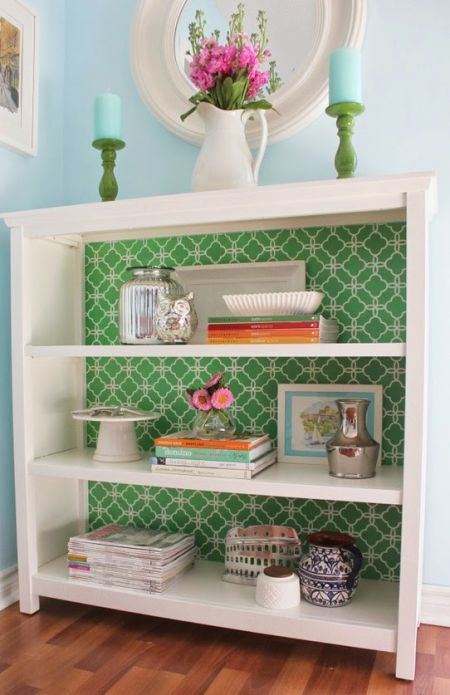
You might already have a couple of old bookshelves in your home that you want to replace with something newer. Even though it might be more efficient to simply buy new bookshelves, it’s also going to be twice as expensive as this fantastic upcycling idea. You can easily breathe new life into old bookshelves with the help of these easy steps.
You’re going to need to get your hands on a patterned wallpaper of your choosing, sandpaper, and some paint.
✓ Step 1: Remove all of the shelves from the bookcase and any hardware that is used to keep the shelves in place. Using the sandpaper, gently buff both sides of the shelves as well as the inside and outside of the bookshelf.
✓ Step 2: Taking the paint you have chosen, coat the shelves and bookcase one to two times. If you want to add even more dimension to your new bookcase, we recommend choosing two different colors for the shelves and the frame of the bookcase.
✓ Step 3: Once the paint has dried and before you put the shelves back, measure and cut sections of wallpaper that will fit perfectly into the back of the bookshelf. Using the application instructions, apply the wallpaper and give it time to dry before putting the shelves back into the bookcase.
4. Ladder DIY Bookshelf
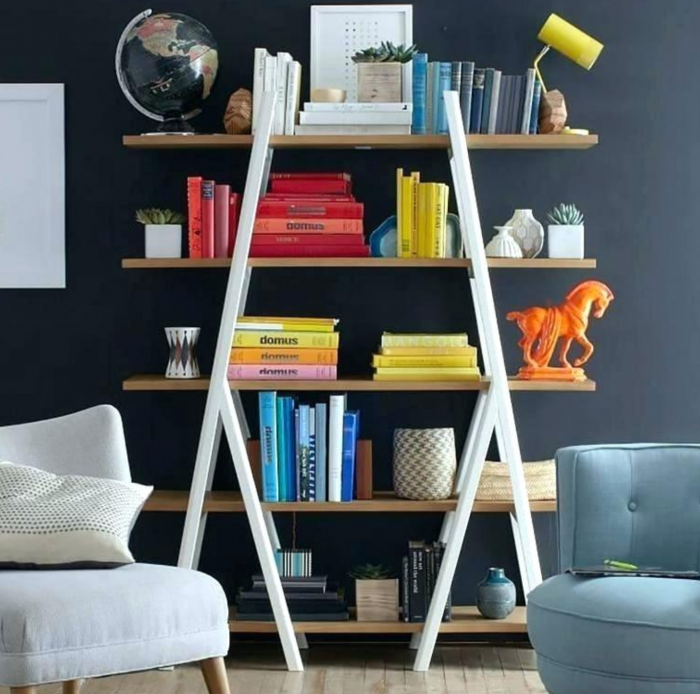
If you’re interested in creating a bookshelf that will easily become the focal point of any room, we highly recommend this DIY. By repurposing an old ladder and using scrap pieces of wood, you can create a bookshelf that will become a talking point amongst your house guests.
For this project, all you’re going to need is an old ladder, four to five pieces of wood cut to varying lengths, and stain.
✓ Step 1: First, you’re going to want to prepare the pieces of wood by applying the stain you have chosen. You may also want to finish it off with a coat of semi-gloss polyurethane.
✓ Step 2: Once the wood has been stained and sealed, you can then slide the pieces through the ladder rungs, starting with the smallest piece of wood at the top. We recommend leaving one to two rungs in between each shelf. So there’s more than enough room to display books of different sizes.
✓ Step 3: If you want to make the shelf a little more stable, use brackets and screws to attach the shelves to the ladder. You may also want to consider securing the ladder to a wall, especially with children in the house.
Creating your bookshelf doesn’t mean you need to spend a lot of money on a brand new piece of furniture. Instead, you can repurpose things you already have lying around the house.
With the help of these simple DIY wood projects, you will be able to create a brand new DIY bookshelf piece. You can also add it to any room in your home that looks fantastic and has a personal touch.
We also invite you to check our DIY cork board ideas and tutorial!
Pin for later